An Idea III. (cont'd)
You are, of course, welcome to copy this concept, adapt it the best way you can - and enjoy the results!
You are, of course, welcome to copy this concept, adapt it the best way you can - and enjoy the results!
Read less
Read less
Views
199
Likes
Awards
Winner in home made photo gear Photo Challenge
Peer Award
Absolute Masterpiece
Outstanding Creativity
Superior Skill
All Star
Magnificent Capture
Categories


roelraadsen
July 15, 2018
Congretiolations winning my "Home-brew photo gear" challenge. Despite there were not many idea's to choose your photo-snorkel is worth winning. Great idea and easy to make. Sure it inspires many to make there photo gear themselves.
 PRO+
PRO+
 PRO+
PRO+
PRO+
PRO+
PRO+
PRO+
Same photographer See allBehind The Lens


Discover more photos See all


Behind The Lens
Location
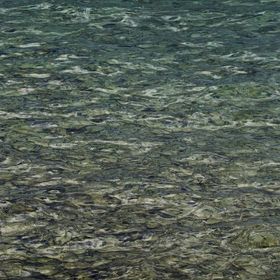
The photos were made in the Lake Ohrid shallows at its northwestern side.Time
August 20th 2017, 13:29:04 - practically noon.Lighting
Nothing but daylight was required for any of those.Equipment
Olympus Tough TG-2, 1/100 sec, f/2.8, ISO 100. Hand-held selfies, all four.Inspiration
I have been looking at diving masks with action camera attachment points on their frames for some time, thinking about the practical side of that solution. It sure seems adequate for SCUBA diving, since the camera is underwater, but in snorkeling the camera would mainly cut the surface, recording both sides of it and all the blurry transitions. So it occured to me to attach the camera to the snorkel. This is better in two ways: First, the camera is underwater the whole time, until you expressly want it to record over the surface. Then you just raise your head out of water. Second, you can visually control the cam function, since the monitor is within the field of view (as opposed to any camera mounted on top of mask). Where exactly you want the camera in the mask FOV? You can decide by the way you combine the angle-switching mounting elements. If you first connect the longer element, the cam will be more to the side, and less high. Combine the mounts another way, and the camera will be further in the viewfield and a bit higher. I'm more comfortable with the first version, but it will depend upon your taste, the camera, or your mask and snorkel type. There are different snorkels, and thus different ways of attaching the camera to one, The same is also valid for (2nd stages of) breathing regulator, which is an even simpler fix; you just have to fasten the cam-mounting base to its wet chamber by an 1/4" tripod screw. Many newer types of snorkels have the water-evacuating valve. I have removed this feature as it is quite unnecessary. I have also removed a "wave blocker" which is equally useless. So I pulled out the valve case and used its place to insert the camera base mount which has a diameter that happened to seal it perfectly. In order to ensure that the base mount stays fixed in proper position, I have used a bottle cap and a short plastic 1/4" screw to connect the base to it. This way the camera base mount stays in proper position in the snorkel mouthpiece. There was no need to additionally fix it; the connection is solid, non-corrosive, and watertight. It is a simple and cheap modification which can be used in any type of diving. When you're not using the camera you simply remove it from the base mount. When you do use the cam, it will be in very practical place, and totally controllable throughout the dive. Another simple thing to arrange relates to the camera buoyancy. Many encased cameras sink, but some models float. In all cases the difference is minimal, but you can completely neutralize the cam buoyancy. You can add either weight or some floating material around the first finger-tightening screw below the camera casing. If your camera case floats, experiment a bit with lead ring. If your encased camera sinks, add a piece of fishing net floater. Shave surplus material from either, to get the camera neither sinking nor floating up.If you find this logical enough, you're welcome to copy the idea! Let me know what you think about it...Editing
I had to re-crop the photos and compile the results in one collage... nothing more was required.In my camera bag
A standard question here gets a standard answer! So I have this answer ready, and just cleverly copy / paste! In the water, I delight in carrying as little as possible, after all the decades of toting big bags of heavy SCUBA equipment. The freedom of this aspect can't be replaced. On dry land, I find it easier to carry a photo vest than any photo bag. So I load my photo vest with whatever I might need for my photo session, walk or trip, while my photo bags usually keep the equipment I'm not using at the moment. The vest's many pockets usually contain two cameras, spare batteries, ND and CPL filters, and one photo clamp standing in for a tripod. Recently I include a small action camera, mainly for its wide field of view and resistance to water and weather. The vest also has large-lens pockets that contain a small water bottle, sandwich, or a bar of chocolate if I plan on being out for the whole day. There is about three meters length of paracord or similar strong, thin rope, one hefty pocket knife, and a lighter. My smartphone comes along too. It has yet another spare camera, but more importantly the Spirit Level App to make the phone a perfectly horizontal surface under the camera. This is essential for panoramic sweeps. The app is free, and requires no extra permissions whatsoever. The large back pocket of the vest is reserved for a lightweight rain poncho. If the weather suddenly plays up, the poncho neatly covers all. Using the tools mentioned above, much can be improvised along the way, so that's all I need to make photos.Feedback
If you have an idea, any idea, there's no better way to explain or describe it than by photography. And when you do it, maybe you'll have the same pleasure of making the idea visible in practice - so photograph the prototype in working conditions and ambient! And the greatest pleasure of all would be - give your idea to the World! You could maybe earn money from it... but donating something to everyone is priceless. True, not all people will follow your line of thinking. Many will be happy with just what they can find on the store shelves, but there are also folks that think out-of-the-box - and they'll be grateful for your version. Above all, enjoy what you do!