

As a continuation of the previous double exposures article, you can really get fantastic results when you start to experiment with each element of your double exposure portraits. The more you push your settings, the more dramatic images you can create.
Sharp Focus vs Soft Focus
When working with double exposures, you will not always need to shoot with tack-sharp focus. While you want to always have your base portrait be in sharp focus (especially the eyes), you can experiment with the second exposure. I like to slightly blur the second image so that the details and texture don’t compete too much with the details in the base portrait. Using a wide aperture like f/2 or f1.8 can also help to create selective softer areas in the second image.
In the example below, the sunflower I photographed for the double exposure had too much detail when layered over the face and I liked the look better with the details much softer. This comes down to personal taste and aesthetic.
Playing with Solid Colors
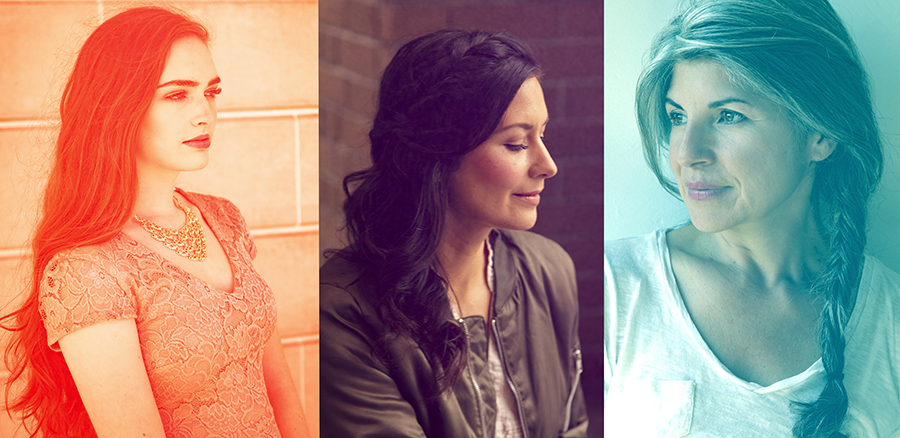
I discovered quite by accident that working with solid colors for the second exposure can have really fun results. I was outdoors one day in the late summer capturing double exposures using flowers and leaves. On my way back in the house I spotted my front door that is painted a bright, true red. Just for fun I used the door as a second exposure and was thrilled with the results. Using a color for the second exposure creates a monochromatic look with increased contrast. I quite like the look and went on to experiment with a variety of colors and surfaces. Below are some examples of using a solid color for the second exposure. The first shot is the one I took using my red front door.
Digging Deeper into Settings
Once you get comfortable with the capture process of doing double exposures, I encourage you to go into the settings and experiment with the available exposure controls. For example, double exposures are just the beginning. You can set your camera to capture and combine 3 images, 4 images, 5 images, etc.

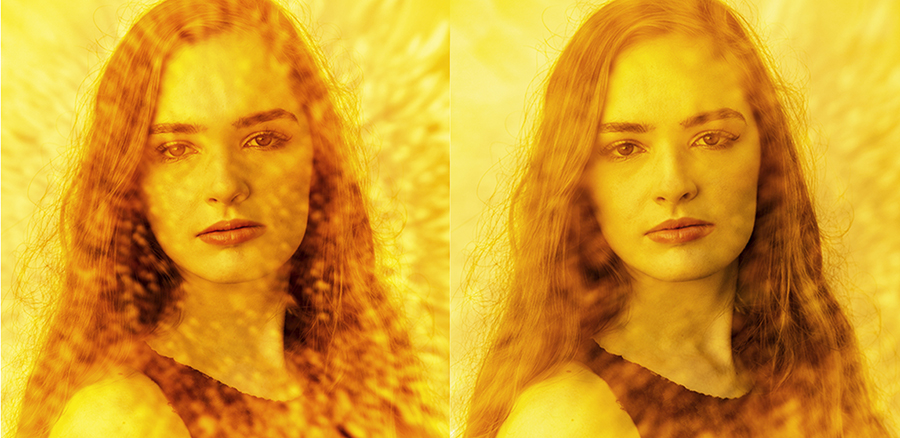
The setting that I play with the most on my Canon 5D Mark IV is labeled as Multiple Exposure Control. This controls how your camera creates the double exposures and by default is set to Additive. This means that one file is added to the top of the other file. While Additive is the most traditional way to capture double exposures, you can change this setting to Average so that your camera will average the exposure between the two frames, creating a much different result. In the examples below, the portrait on the left uses the default Additive setting while the portrait on the right utilizes the Average control setting.
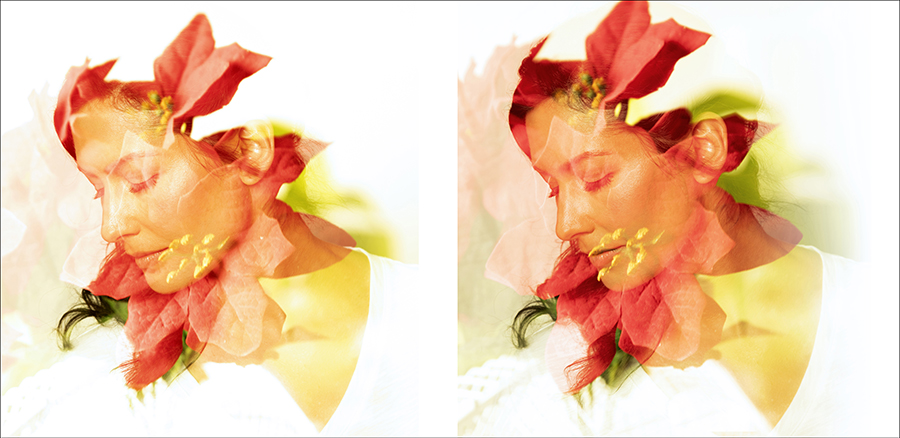
When I really feel like experimenting, I like to set the Multiple Exposure Control to Bright or Dark. These settings can result in super dramatic portraits and the drama will vary, depending on the available lighting conditions and subjects. In the example below, the portrait on the left was set to the default Additive setting while the portrait on the right was set to Bright. The increased contrast of the portrait on the right helps the subject to stand out from the busy details of the second exposure.

Post-Production Tips
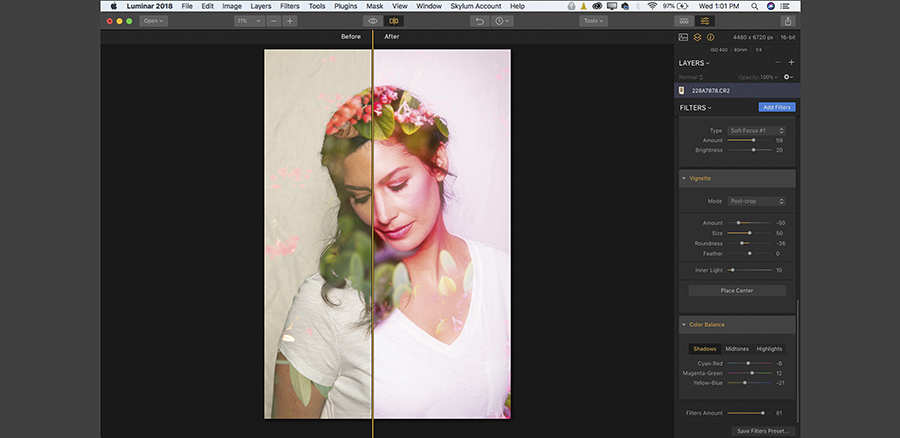
When it comes time to transfer your images from your camera to your computer for post-production, there are a few editing tips that can help a lot. I like to use Skylum’s Luminar software as I like that I can process the RAW file and then have all the creative tools I need to do anything from small tweaks to completely transforming an image. In the example below, I used a portrait Preset called Daydreams to get close the look I was after and then I made small adjustments.
If you are using Adobe products for post-production such as Photoshop and Lightroom, then the Dehaze tool is key. The first setting I like to start with when doing RAW file conversion for double exposures is the Dehaze tool. This function helps to decrease the “haze” that’s caused by 2 images stacked on top of each other. After Dehaze I usually increase the contrast and tweak my color settings until I get the desired results I am after.
Double exposure portraits are so much fun to capture and this time of year, the possibilities are endless. So grab your camera and start creating!
Based on the California coast, commercial photographer Laura Tillinghast began taking photos in the 90’s and never stopped. Her love of lighting and photography is contagious and she enjoys teaching the next generation of photography addicts. Shooting primarily commercial work, you never know what you will find in front of her lens. Whether it's a gorgeous model, a rock band or a bowl of oatmeal, she shoots with the same goal in mind; make it beautiful. See more of her work at her website: lauratillinghast.com