
Greetings fellow Earthlings, my name is Paean Ng, a self-taught nightscape astrophotographer from Perth, Western Australia. Over the past 2 years of my life, I have been travelling to various iconic locations around Western Australia, photographing each location by night. These are some things to consider if you'd like to photograph the night sky.
Tip 1 - Equipment
Let's face it, to get good results you need decent equipment. In general Full Frame cameras produce the best results because of the larger sensors, giving higher dynamic range and and better noise performance compared to small sensors.
Cameras like the Canon 6D, Nikon D750 and Sony A7S are desirable.
I personally like fast wide angle lenses for Astrophotography. My lens of choice is the Sigma 20mm 1.4 ART lens. The wide field of view allows me to keep the shutter open for a longer period of time without getting noticeable star trails. Along with a large 1.4 aperture, it allows me to gather a huge amount of light in a single exposure.
These are some great lenses for Astrophotography:
Tamron 15-30mm f2.8
Sigma 20mm f1.4
Irix 15mm f2.4
Samyang 24mm f1.4
Besides the Camera and Lens, ensure you have a sturdy tripod. Remember, we're dealing with long exposures and the tiniest movement caused by a flimsy tripod could ruin a shot.
Several other accessories I carry in my bag are a remote shutter release, a red light head lamp and a compass.
Tip 2 - Know your equipment
One of the obvious challenges of astrophotography is shooting in the dark. It takes your eyes 10 to 15 mins to properly adjust to the dark conditions and using a flashlight would ruin your night vision. To avoid turning the light on every time you have to change a setting, it's best to learn the functions and buttons of your camera and other equipment inside and out.
I have spoken to many people wanting to get into astrophotography but don't even know how to change the White Balance in the camera. I would suggest beginning by learning all the functions of your camera.
Understanding your equipment goes beyond knowing what's in the camera menu and where the buttons are laid out. It also involves thoroughly researching the advantages of your chosen camera system and exploiting it to your advantage.
In my case, I use a Nikon D750 DSLR. I did a lot of research about this camera before deciding that it was the best choice for me and I ended up purchasing the D750 for these reasons:
Tilting LCD – extremely useful for composing shots from awkward angles
ISO Invariant Sensor – The ability to adjust ISO in post
Exposure Preview in Live View
It might be a surprise to some, but the Nikon D750 is the only Full Frame DSLR on the market that possesses these 3 features together.

Tip 3 - The Numbers Matter
Nightscape Astrophotography is all about numbers. From calculating your shutter speed to deciding on the grid format for a panorama, it's important to understand the numbers.
In general, you'd want sharp stars unless you're shooting star trails. To avoid any noticeable star trails, use the 500 rule to calculate your maximum shutter speed.
Max Shutter = 500/focal length
For example, if I am using a 24mm lens on a Full Frame camera:
500/24mm = 20.8 seconds
So the maximum shutter speed I can use with a 24mm lens without getting noticeable star trails is 20 seconds.
The logical conclusion of the 500 rule is that the wider the field of view, the longer you can keep the shutter open, thus collecting more light.

Tip 4 - Planning your shoot
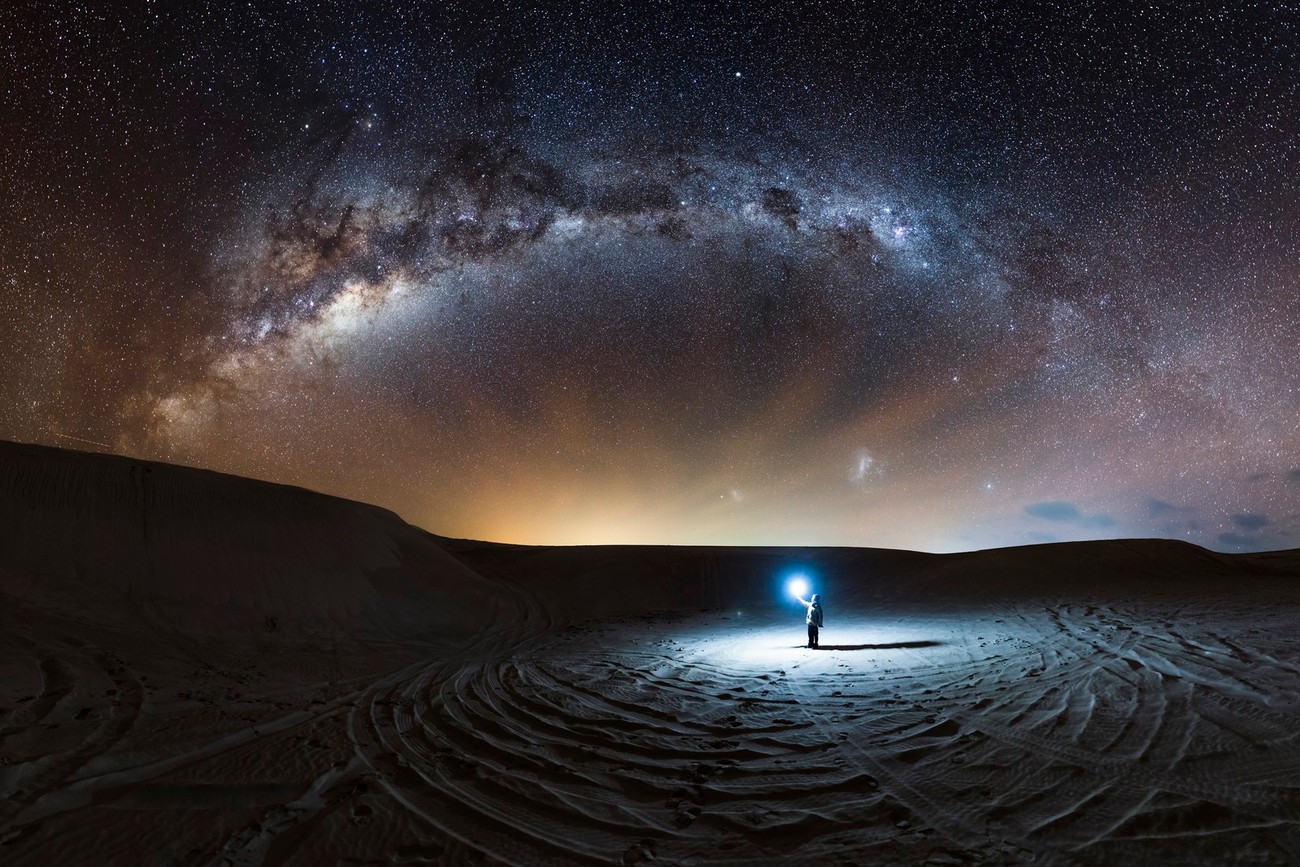
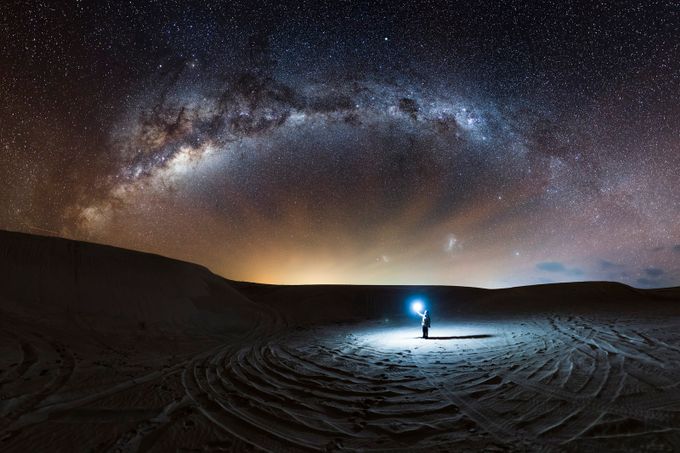
It's difficult to compose a scene when you can't see anything. I often reach my desired location just before sunset to scout around and get idea of how I want to frame the shot under the Milky Way. Arriving in the day also allows me to plan my walking route from my car to the shooting location. You never want to venture into an unknown location at night. Always remember your safety.
To work out the position of the Milky Way, I use an app called Stellarium. Stellarium allows us to visualise the position of celestial objects in an interactive photosphere.
Another thing to consider is the moon phases. Ideally, we want to shoot during the new moon or a crescent moon where the moon softly illuminates the ground while avoiding washing out the stars in moonlight.
One last thing to consider while planning a shoot is the weather. The weather can be unpredictable, so always check the cloud cover before leaving for a shoot.
Tip 5 - Focusing at Night
The obvious challenge of shooting at night is the limited visibility. The camera's Viewfinder is almost useless. Use your camera's Live View instead.
To ensure your lens is properly focused on the stars, set your camera to Live View mode and point your camera towards a bright star. Zoom in on the star and focus your lens until it is as sharp as it can be. Set your camera to manual focus and zoom out.
Check your focus throughout the night with the same technique. It's not uncommon for lenses to drift out of focus.

Tip 6 - Post Processing is the Key
Capturing a photograph of the night sky is only half of the fun. The other half comes from processing the image to bring it to life. There are no set rules in processing night shots. Some prefer to process in a more artistic way and some prefer more scientifically accurate ways.
The key is to try different processing methods and try to match the exposure and contrasts of images that you like.
I tend to use a combination of Adobe Lightroom and Photoshop to process my images. I mainly process my images in Lightroom to correct the Colour Balance, add Contrast, clarity and noise reduction, and use Photoshop to do specific astrophotography enhancements like Star Reduction and Luminosity Masking.
One key point in processing the Milky Way... The Milky Way core is pale-yellow in colour. It is never magenta.

Tip 7 – Safety First
Driving at night can be hazardous. Watch out for the wildlife and never drive tired. Never underestimate how much damage a Kangaroo can do to your car. I often drive hours out into the Australian country in search for dark skies. However, these remote areas are prime habitat for wildlife.
Last year, I hit a Kangaroo at 2 am on my way back from a shoot. It caused an estimated $5000 worth of damage. Thankfully I was alright and insurance paid for the repairs. Since then, I have bought a more appropriate car for the job and added a lighting kit in hopes that I will see the next Kangaroo and stop in time. :)
Be safe out there.
