jamesnelms
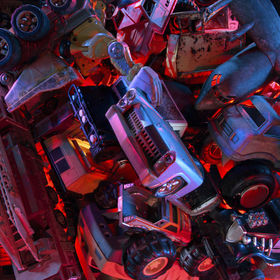
FollowA pair of Kennedy era Navy fighter jets on display at the Fort Worth Aviation Museum.
A pair of Kennedy era Navy fighter jets on display at the Fort Worth Aviation Museum.
Read less
Read less
Views
100
Likes
Awards
2020 Choice Award
Peer Award
Superb Composition
Absolute Masterpiece
Magnificent Capture
Top Ranks
Categories
Same photographer See allBehind The Lens
Discover more photos See all
Behind The Lens
Location
This was captured on the grounds of the Fort Worth Aviation Museum in Texas. The museum, located next to Meacham International Airport, is primarily an outdoor park with 24 historical military aircraft on open display, as well a smaller indoor museum and gift shop. The two planes shown here are facing the street.Time
The image is multi-exposure light painting composite taken from a fixed tripod. The first exposures were made at sunset and continued for another two hours after sundown.Lighting
This is a light painting composite. The first exposures were taken at sunset to capture both aircraft silhouetted against the dramatic sky. As it grew darker, I lit various parts of the aircraft in 10 to 20 second exposures with hand held LED lights and a camera flash. To light the planes from above, an LED wand light was fixed atop a extendable painter's pole, as I walked behind the aircraft shining the light on top during a 30 second exposures. I also used a borrowed Yonguo Light Wand attached to an extendable pole to provide top down light.Equipment
The most important part of any multi-exposure shot is a rock steady tripod. I use an ancient Bogen steel tube tripod mated with a modern Manfrotto 3-axis head. My camera is a Nikon D7100. It's an inexpensive pro-consumer camera that produces 24-mega pixel images, which are more than enough for compositing purposes. The lens for this shot is a standard Nikon 18-105 mm kit lens. I often use a wide angle Tokina 12-24 mm lens for night shots, but wide angle lenses create to much distortion when shooting large subjects like aircraft. Lighting was a mix of old hand held flash, an inexpensive mulit-LED wand style work light purchased from a hardware store and a borrowed Yongnuo Light Wand. The Yongnuo Light Wand is a wonderful tool for light painting, but can be expensive. However a good multi-LED flashlight or work light, can be just as effective for much less money.Inspiration
I've been doing multi-exposure light painting night photography of abandoned cars, trucks, houses and barns, for several years. An aviation photographer friend of mine with museum connections, got me after hours access to the museum grounds few times last year. He also coordinated a special light painting event at the museum in which I taught novice photographers my light painting techniques. The inspiration for this particular photo was the proximity of these two classic naval aircraft to one another. They are almost but not quite parallel. The combination of the two planes, the power lines and the recognition strobes of the passing plane overhead, form diagonal lines radiating from a common perspective point at the right of the composition.Editing
The final image is a composite of dozens of exposures, layered one atop the other in Photoshop. An earlier exposure of the silhouetted planes against the sunset sky forms the base image. Subsequent layers, each showing various lighted parts of aircraft are laid down on top of the base layer. Each new layer added is set to 'Lighten', which adds light to the composition. Unwanted elements in each new layer such as myself or the lights themselves are simply masked out. The final result, can be an eerie, unnaturally lit, surreal landscape that would be impossible to achieve in a regular photograph.In my camera bag
My backpack has my Nikon D7100, with three lenses; a Nikon 18-105 mm kit, a Nikon 55-300 mm zoom and a Tokina 12-24 mm wide angle. I also keep a cheap flash and shutter cable (super important) in the bag as well. I have two tripods and a good monopod as well. A light tripod and monopod work well for most uses, but for night shoots, I always use my Bogen steel tube tripod. My light kit is essentially a plastic tool box with various flashlights, cheap LED worklights, batteries, multi-tool, zip ties and OFF spray to keep away mosquitoes. (Never forget the OFF) I used to use a radio remote shutter that I purchased cheaply on Amazon, but unfortunately it stopped working one night and never got it to work since.Feedback
Know your shot before you take it. For most light painting shots, I try to start setting up before sunset. This allows me to easily set up my composition and lock down my focus. It also allows me to do a safety walk around my subject, looking for any obstacles or things on the ground that could trip me up in the dark. Furthermore, it gives me a range of light to use in the final composition. It's always better to have more shots than you need than not enough. A sunset sky can often be blended into a night sky with stars, creating a hyper real effect. Plus, while light painting it's always possible to miss an element. Having an earlier low light exposure can fill in dark gaps.


