

Portraits done in B&W can be stunning and some of the most memorable in a photographer's portfolio. Without color, the subject of a B&W portrait can stand out more with greater visual impact. To ensure that your B&W portraits have this effect on viewers, there are several ways that you can process them during post-production.

1. Increase the Contrast
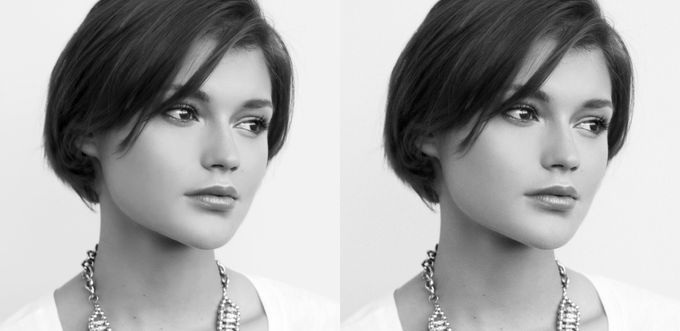
When shooting in low-contrast lighting conditions such as deep shade, an image converted to B&W can lack contrast and look somewhat flat. For a B&W image to have good tonal range, you need the image's highlights to be bright and the deep shadows to be dark. Increasing the contrast will do this in one step. In the example below, you can see that the increased dynamic range of deeper shadows and brighter highlights results in a more interesting portrait on the right. I usually make these changes using Adobe Photoshop or Skylum's Luminar software.

2. Consider Adding Grain
The modern digital cameras that we work with today offer very sophisticated technology to anyone with an interest in photography. These cameras make it easy to create a beautiful photo that is clear and perfect for printing. However, during the first days of photographic portraits and film photography, images had a grainy quality and looked a lot less sharp due to the nature of film and photosensitive materials. As technology has advanced, film cameras have improved more and more, and now we hardly ever see grain within modern portraits.
When processing portraits from color to B&W using photo software, I like to sometimes add a little grain to the final image. This can work especially well for stylized portraits that will benefit of some additional texture and grit (like a cowboy portrait). In the example below, you can see a little more grain in the skin tone areas and the edges of the shadows. It comes down to personal preference if you like this look and how subtle you want to go with it.
3. Warm it Up
The nature of B&W portraits lacking color can leave them feeling a bit cold in terms of tone and feel. I like to add a slight warming filter when editing a portrait to give it a more welcoming feeling. If an image particularly calls for a feeling of warmth, I may dial up the intensity of the warming filter even more. In the example below the portrait on the right includes a 15% warming filter added in Luminar.

Born and raised on the West Coast, Laura Tillinghast began making art at a young age. She explored many mediums until finally discovering photography when she was 17 years old. From that point on, she knew she had found the tool she was looking for to bring her imagination to life. Shooting primarily advertising and editorial content, you never know what you will find in front of Laura's lens. Whether it is a gorgeous model, a rock band or a bowl of oatmeal, she shoots with the same goal in mind; make it beautiful. See more of Laura’s work at her website: lauratillinghast.com