

The universe is something humans have been mesmerized and perplexed about for centuries. The sky is the window to a sea of colors, magic and questions marks. What do we really know about the universe? What do we really know about the things we see in the sky anyway? Our community member Derek Sturman (dereksturman) is fascinated by the earth’s changing sky and tries to capture its different moods. Derek is an aspiring nightscape photographer who has a great deal of tips to share with his fellow ViewBug friends. Here are Derek’s Top 7 Sky Photography Tips.
1. Check Weather and Astronomical Conditions
I have found that there are various apps created entirely to help photographers plan around pesky conditions that ruin potential photos. The three apps I use every time I am about to go shoot are: "Phases of the Moon", "The Weather App", and "PlanIt for photographers". These three apps allow me to determine if attempting to shoot the milkyway will be possible in the first place before heading out to the location. They also allow me to plan my shots and foregrounds a bit better knowing astronomical alignment ahead of time. As far as landscape photography goes, using the weather app and "Golden Hour Calculator" I am able to determine the best hours and lighting to attempt to get a very well lit landscape with the type of sky conditions I am hoping for.
2. Use a tripod… Always
I have just found that simply having to use a tripod forces you to plan your shots a little better. You just have to think things through a little more and put in just that little bit of extra effort to set up the tripod which ensures better shots. Using a tripod also saves you from having all those shots you just didn't take the time to adjust your shutter speed properly and as a result got several really blurry images. Using a tripod also allows you to do things like stack, HDR and focus stack.
3. Use A Shutter Remote
Again, this will help you avoid touching the camera while it is on your tripod and result in crisper and more dynamic photos.

4. Use filters, Use filters, Use filters (!)
I have never been so surprised at the difference in results as I have with using the proper filters. The right filter will turn a seemingly dull and colorless image into a very dynamic photo. Simply using a CPL or any form of polarizing filter will significantly change what you can capture in an image.

5. Stack
Image stacking can be done for many reasons. In my case I use a crop sensor to shoot astro - which results in a lot of noise in my images. To compensate I image stack. Simply taking four or five photos of the same shot can save you in the long run. Not only does it protect you by having failsafes in the even that one was blurry or had unwanted elements, but you can also improve your photography leaps and bounds by focus stacking, bracketing to create HDR images, and stack at the same exposure and use the extra recorded information to reduce noise later.

6. The Sky Is Moving
When setting up for a shot that requires stitching or stacking like a panorama or HDR, pick your location and shoot the sky first. Often times when you pick your location the sky looks how you want at that moment, but it wont in ten to fifteen minutes. Always start but capturing the elements in the sky how you want them to look, they will change but the foreground isn't going anywhere.

7. Experiment And Be Patient
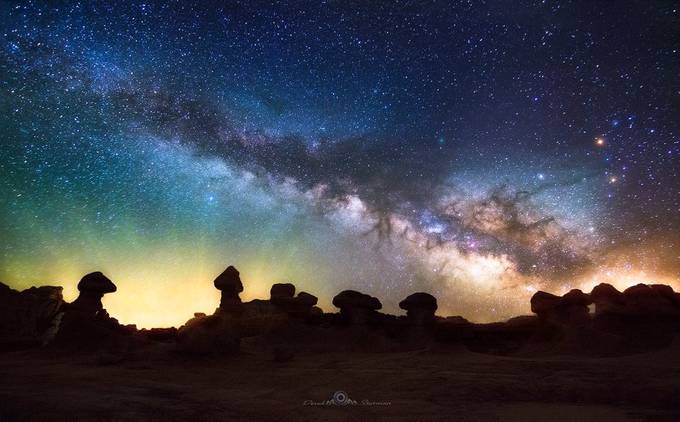
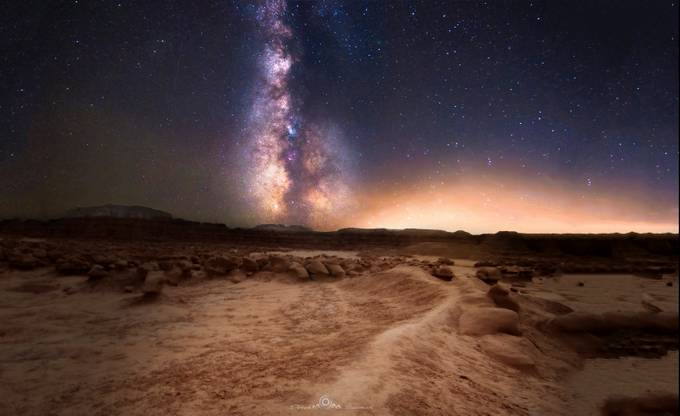
This might be the most important one of all. I prefer to shoot the milkyway over almost any landscape, simply because the camera actually picks up more color and detail than the human eye - much the opposite of regular day time landscape photography that never seems to look as good in images as it did in person. There are often things that look bland to the eye that the camera actually captures extremely well. Try taking pictures of things and elements in the sky that you can't really see with your eye. I have had cloudy nights turn into incredibly vibrant looking skies because some simple light pollution reflecting off the clouds my eyes could not see.

I have also learned that patience is the difference between professionals and amateurs. All good photographers have learned that good things come in time, they will often spend hours and hours waiting for the conditions they are wanting - something I have yet to start doing. However I have personally seen sunsets that can not even be seen because of thick grey clouds turn violently into the most colorful and breathtaking displays of light. Always wait until long after the light is totally gone, or the conditions make your shot impossible.
For more great photos taken by Derek, visit his profile, website, Instagram and Facebook.