
We are excited to share the following tips by the incredible travel photographer Hudson Henry who will be judging the Right Place and Time Photo Contest. Hudson Henry lives to create dramatic still and motion imagery. While renowned for his adventure, travel, landscape, documentary field work and fine art prints, Hudson enjoys teaching creative workshops as well as producing commercial projects. A particular passion is the production of ultra-high-resolution panoramic merger images and very large prints.

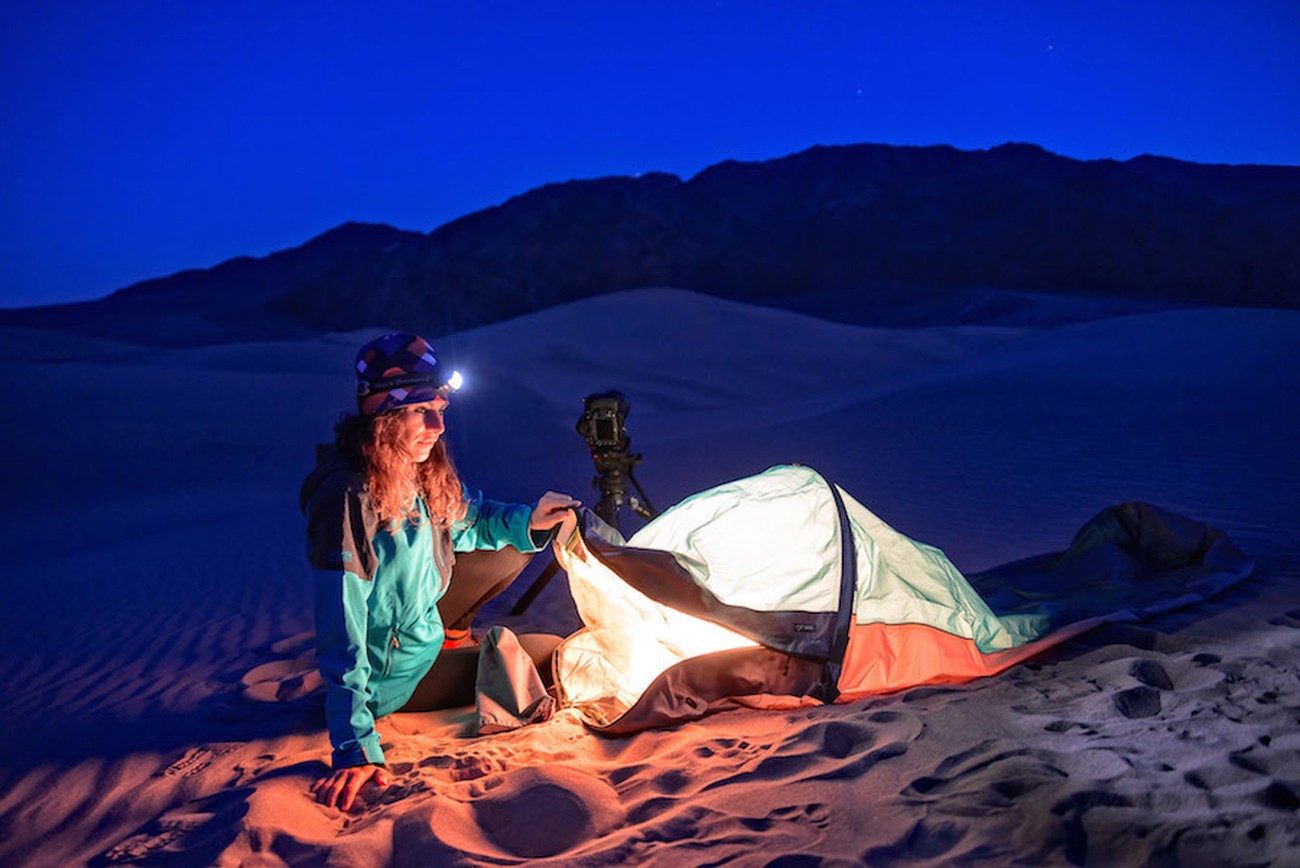
I usually throw my Outdoor Research Alpine Bivy in the bag in case I decide to stay longer.
1. BE PRESENT
This fundamental tip isn’t as simple as it sounds. Obviously, if you fail to reach your locations you won’t capture great images. But your physical presence alone is not enough. I firmly believe that to capture a really special still image, a powerful image, we photographers must be connected to our subjects... In this case a place. Do some research ahead of time. Find out interesting details about the place you are traveling. Then go with enough time to really get a feel for your location and find compositions that best convey what’s special to you about that place.
I’m a big believer that most rules are really suggestions waiting to be broken under the right circumstances. This is the only photographic one I can think of that is hard and fast. You have to be there and feel something. Otherwise, your viewer likely will not either. 

Choosing to eat late this evening let me find this amazing scene in Hood River, OR.
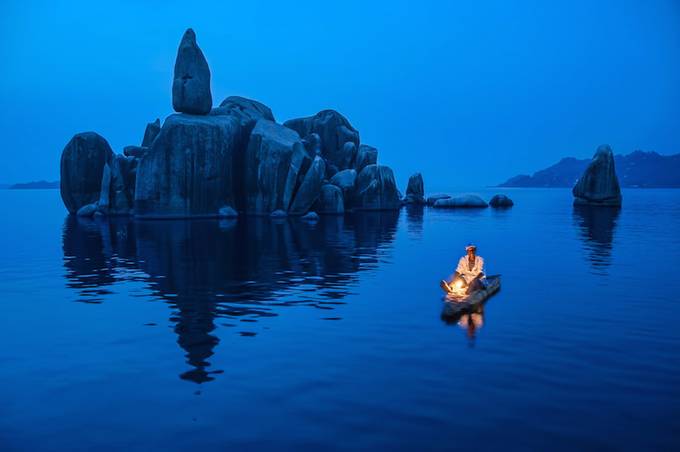
2. BE PATIENT AND USE GOOD LIGHT
To truly capture great travel photography we have to be both patient and diligent. When I travel, I do research beforehand and arm myself with ideas of what I want to photograph. When I arrive, I use the middle of the day to find specific locations and scenes I want to capture. I think about them relative to the sun and weather. Will this be better backlit at dawn or bathed in good light at sunset? What could I photograph in the fog that’s forecast for tomorrow?
If I’m eating dinner with friends as the sun goes down, or sleeping at sunrise then I’m missing the best light. I always set my alarm to see what the sky looks like long before sunrise.
Oh yeah, I tend to eat late on travel assignments whether I’m in Southern Europe or not...
 

A tripod forces deliberate choices about composition
3. USE A TRIPOD
Sure, tripods are essential in low-light and long exposures, but they also force photographers to take more time and focus on composition. I believe this is especially true for less experienced photographers. Carry a secure, good quality tripod and head. Take the extra time to set it up and really look at the frame you are about to expose. I often handhold the camera to roughly determine where I want it before I set my tripod up. Once you’re set, take your time and perfect your composition. Are there distractions in the frame? Can you remove them or change positions to avoid them?
Sure, sometimes I love the freedom of shooting handheld, but the vast majority of my portfolio images were taken atop a tripod.


Accessible gear is key for capturing fleeting moments like this.
4. KEEP GEAR ORGANIZED AND ACCESSIBLE
What camera and lens you use is of little consequence if you don’t know exactly where they are. Without your gear easily accessible, you will find yourself missing photographic opportunities. For everyday and shorter trips I use F-stop bags. They have modular padded organizers, serious load-distributing harnesses and an easy access back panel to get to my gear quickly. I keep a Black Rapid backpack strap mounted for occasions I want to sling the camera at my side. On expeditions, I mount an SLR holster to the chest harness of my huge Gregory backpack and carry a Black Rapid Yeti sling strap for situations when I leave the backpack behind.
Without a system for keeping my equipment comfortably close, I would have missed a great number of my favorite images like this chance encounter with a mountain goat in the cascade mountains of Washington State.
Waste as little space as possible in your compositions
5. FILL THE FRAME WITH YOUR SUBJECT
Ideally, you’re composed image is filled with your subject matter and devoid of all distractions. In the real world we work to minimize distractions while filling the frame with subjects we care about. I love to photograph landscapes, cityscapes, people and wildlife. My favorite thing is to tell something about a person or animal by placing them in their environment within the frame. The goal is to include only those elements and negative space that help me to tell a story.
Think of it this way... When a viewer asks, “what were you photographing?” then you haven’t filled your frame well enough.
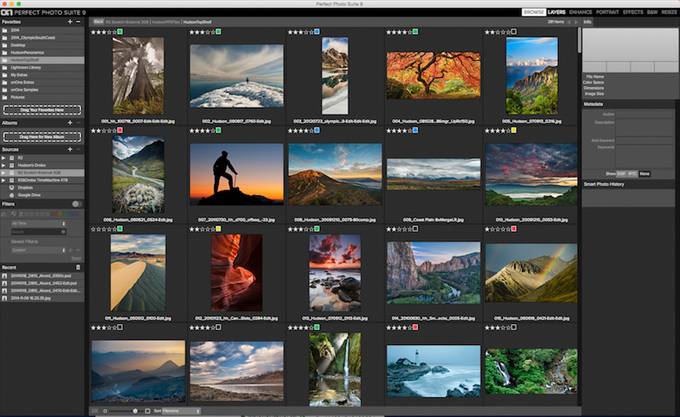
6. CULL, EDIT, REPEAT...
During your last trip you shot over 1,000 frames. Great! Don’t show them all to people. Perhaps the hardest part of becoming a better photographer is self curating your portfolio. Go carefully through all your images and choose only the best to edit. Then edit those selected images and cull through them yet again to showcase only the best of those.
When I get back from a trip I use on1’s Perfect Browse 9.5 and it’s “Fast Preview” mode to quickly identify the many RAW images that should be culled (thrown away). After deleting those, I import the images into Adobe’s Lightroom (creating full 1:1 preview files) and further cull the collection before I do basic RAW processing within Lightroom. I finish my editing in on1’s Perfect Effects 9.5 because it allows me to easily and efficiently get the final look that I want. Before I publish newly edited images or share them with friends, I sleep on it and go through one more time to be sure I am happy with each one.
I can assure you: the more you embrace the need to self curate and edit your images, the more excited your audience will be to see them.
Learn more about Henry Hudson and see more of this images