

We are excited to share the following inspiring tips by ViewBug guest judge Patrick LaRoque. Patrick is a commercial, documentary and portrait photographer based in Montreal, Canada. He is an official Fujifilm X-Photographer and founder of the Kage Collective, an international group focused on visual storytelling and documentary projects.

In Patrick's own words:
Back in the days of analog photography, multiple exposures were as simple as not advancing the film before taking another shot; frames would pile up one on top of the other and the results depended on an impressive ability to previsualize or... Well... Blind luck.
As with many things, the digital version simplifies the process by allowing us to preview and better control the entire operation in-camera. And while many would argue that this effect can much more easily be achieved in post, there's something about the random, improvisational aspect of doing it live, on the spot, using whatever is on hand, that I believe can yield surprising and rewarding results.
Not all cameras can do this and the number of possible exposures as well as the amount of control will vary depending on manufacturer and model, but the basic principles always remain the same. For the sake of simplicity, let's assume a simple double exposure:

"Some things don't change: it's always about originality, passion and emotion pull"
White is empty, black is full.
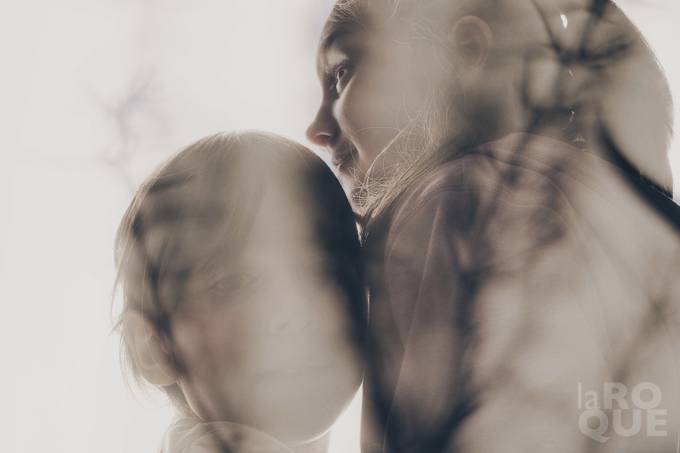
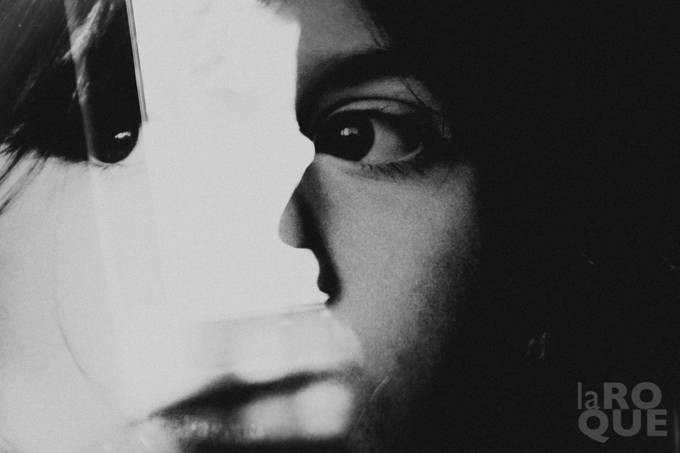
Keep this in mind. You can control the areas where the second exposure will be visible by remembering that phrase. The most extreme example of this would be a black silhouette shot against a pure white background: the silhouette will be filled with your second exposure while the background will remain white and empty. Areas in between will vary in opacity depending on how light or dark they are.
Live view or EVF
If your camera supports it, use Live View or the EVF/LCD to see the results as you're working. I'm a Fuji shooter and while the double exposure mode on the X-Series cameras is basic, it does allow me to see the first exposure as I overlay the second one; I believe some Canon models can do this as well. This takes away the guesswork and turns the feature into an actual tool that can be controlled very precisely.
Go manual
I may use autofocus to shoot the base image but I always switch to manual for the second shot; this allows me to play with the amount of texture I'll be adding. A bowl of oranges for example, can go from something very gritty or geometric to nothing more than a haze of orange colour. And when we're seeing all of this in the EVF/LCD as we're working, it becomes a very interactive process.
Two settings, double the fun
We're working with two layers here and there's no reason to keep their settings identical. Play with it: f8 on the first shot for something very crisp and f1/4 on the second one to create a shallow depth of field and add dimension. You can also vary the exposure between the two shots, change the shutter speed to create motion blur... Each image can be as distinct or similar as it needs to be; what matters is the end result.
Blend, composite or texture
All these options allow us to choose various types of double exposures: we can blend two images seamlessly, making them look like a single picture; we can composite them so each is still perfectly recognizable, bringing two disparate elements together in a single frame; or we can use one of the images simply to add texture, create shadow areas, add a burst of light or anything else that will add depth, mystery or drama to the scene.

Double exposures harken back to the dawn of photography and while the magic may have lost a bit of its luster in this digital age, the resulting images can still be just as compelling. Some things don't change: it's always about originality, passion and emotion pull.

View more of Patrick's photos - follow his ViewBug profile!