Kelseygs
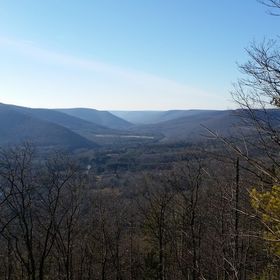
FollowTaken at Philmont Scout Ranch, Lumix LX100, F1.7, 20sec, ISO 2k
Taken at Philmont Scout Ranch, Lumix LX100, F1.7, 20sec, ISO 2k
Read less
Read less
Views
162
Likes
Awards
Action Award
Zenith Award
Creative Winter Award
Curator's Selection
Judge Favorite
Top Shot Award 21
Legendary Award
Great Shot
Top Ranks
Categories
Same photographer See allBehind The Lens
Discover more photos See all
Behind The Lens
Location
This photo was taken in the Valle Vidal section of Carson National Forrest, NV.Time
This was a photo that I had been planning the entire time across my 12 day backpacking trip. I was unsure of the conditions of each camp until we got there, and this was the best opportunity I had. We were 7 days in, and the time as about 11:30pm.Lighting
I had used a Luci Lantern that I put into the tent to provide a foreground interest. I also used a flashlight to highlight the grass around the tent, and the other two in the background.Equipment
I used a Panasonic Lumix LX100, set at 24mm equiv., f1.7, 20sec, at ISO 3200. The camera was set on a Gorrilapod tripod directly on the ground. I had a Luci inflatable lantern that I had put into the tent to provide a foreground interest.Inspiration
I had set a couple of goals on my backpacking trip, and a milky way photograph was on top of the list. This would be my first time actually taking a decent photo of it. I would look up at the night sky before climbing into my tent each night, and most nights went with a sigh. This night, however, the clouds were not too bad, the moon was still below the horizon, and I had a foreground to frame it on. I quickly rushed into my tent, grabbed the gear, and asked one of the other members of our trek who was still up if I could stash my lantern in his tent for the photo. I set up the tripod, carefully bent a couple of pieces of grass out of the way, and started shooting.Editing
I first brought the images I took into DXO Optics to correct for white balance, optical distortion, and other minor items. I did not touch the noise reduction at all. Then, I sent about merging the 5 photos I took exposed for the night sky. I had to manually align them, as the stars move across the sky during each of the 20sec exposures. I then blended in the foreground with the 3 I had for it (one with no light, one with the lantern, and one with the lantern and the flash light). After that, just some light color balance, and here it is.In my camera bag
I normally have in my bag, a D5200 which has the flip out screen which is great for getting the high and low spots, a 18-200mm VR which provides a great range, and 2 speed-lights with remote triggers. I also use a no-name tripod, which has held up greatly. While this is what I normally have in my bag, for my weight conscious endeavors, I typically take a Panasonic Lumix LX100, a Luci Lantern,and a Gorrilapod tripod.Feedback
Do your research, it will surely help. Pay attention to your focus (I didn't), and wait. A lot of times the key is to wait for that perfect moment to appear. You want to make sure that your shutter isn't too long, and your ISO isn't too high for the camera you are trying to use. An exposure calculator app for your phone is a great tool to have, as well as a flashlight or two for highlighting foreground elements. Above all, have a vision, and strive to achieve it.


