
Photo by Peter Dam
Landscape photography is challenging from many points of view. You have to find the perfect places to photograph, which means exploring remote locations, carrying your equipment, and waiting for the best weather conditions. You also have to frame a vast 3D scene into a 2D picture without losing the sense of depth to avoid creating flat compositions.
There are also technical challenges due to using exclusively natural light and shooting in unpredictable weather. On the other hand, landscape photography creates a deep bond between the photographer and the environment. It’s impossible to take good landscape photos without loving to be outdoors, embracing the elements, and having lots of patience. Yet, some technical tips can help you become a better landscape photographer and be prepared to take good photos in all types of weather and terrain. Here is what I find to be most useful for landscape photography.
1. Shoot wide-angle, but not all the time
Many beginners believe that landscape photography strictly means wide-angle lenses because it’s the only way to frame the entire scene. The truth is that for tight shots where you struggle to get everything in the frame and want the foreground to be dominant, wide-angle is fine. However, a longer focal range offers more compression by pulling the background closer to the foreground and making the background more dominant. Thus, if you want to give weight to a faraway background (e.g., mountains with a cap of snow) and emerge the viewer deeper into the scene, you should consider using telephoto lenses.

A wider view of Mitre Peak (16mm focal range) - Photo by Peter Dam
A narrower angle offers other benefits too. It allows you to individualize a part of the scene, focus on details, avoid framing unwanted objects (e.g., electricity poles and wires, trees), and reveal far away subjects such as a mountain’s peak. Besides, using a wider focal range diversifies your portfolio and provides tools for exploring different angles and perspectives.

Using a longer focal range (70mm focal range) and stepping 50 meters to the side. Look how the mountain (Mitre Peak) is now much more dominant - Photo by Peter Dam
2. Choose a Mid-Range Aperture
Mid-range apertures are also called the sweet spot of your camera lens. They’re the apertures at which the lens provides the maximum sharpness, and sharpness is something any landscape photographer wants.
Choosing a mid-range aperture provides a wide enough depth of field to have both the foreground and background in focus, especially when you do use a wide-angle lens.
For landscapes where there isn’t a significant distance between foreground, middle ground, and background, you don’t need the smallest aperture to have everything in focus. And if you don’t have the luck of a bright overcast day, a larger aperture will help you maintain a short exposure without compromising other settings. With an aperture of f/8 or f/11, you can use a relatively quick shutter speed and a low ISO value, making it possible to take sharp pictures without a tripod.
Some newer cameras also allow you to focus stack in camera, to enjoy the sharpness of using a medium-range aperture, and still get front to back sharpness in the image.
3. Use a Low ISO for Maximum Image Quality
As a landscape photographer, you want sharpness, clarity, high color accuracy, and lots of details. There’s no place for noise of any kind, so try to keep the ISO at the lowest values possible.
To maintain a low ISO and assure correct exposure, you need to adjust the shutter speed and aperture. As I mentioned above, start by choosing a mid-range aperture that allows more light into the camera and, at the same time, provides the depth of field you need.
If you shoot at dawn or dusk, on winter days, or a cloudy day, you might need to prolong the exposure time and use a tripod to avoid camera shake. But the result will be impressive. Soft, smooth colors of your landscape will blend in into a natural work of art.
Bonus Tip: Use ND filters to play with motion blur
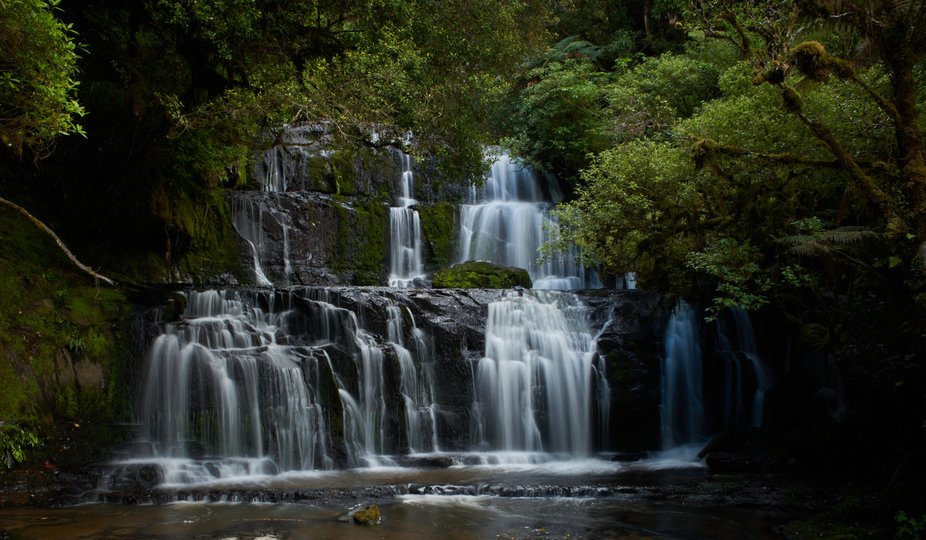
Even on bright summer days, you may still create amazing long exposure effects, even though you still get the best results with softer light if the sky is included in the frame. All you have to do is use ND filters to reduce the intensity of the light and slow shutter speeds to create motion blur. Subjects such as rivers, waves, and waterfalls are perfect for playing with motion blur. You can also create a more shallow depth of field (set larger apertures) without risking overexposure.
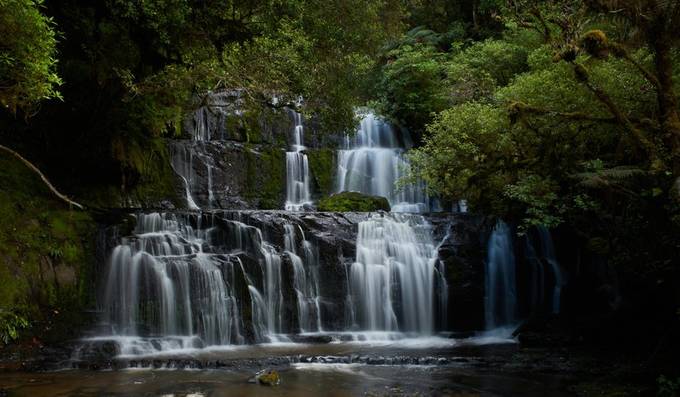
Using a shutter speed of 0.8s and a 3 stop ND Filter the water running down the waterfall becomes a lot softer and smooth - Photo by Peter Dam
ND filters have different darkness levels and reduce the intensity of the light with up to 10 or even 16 stops. Add just a 2-3 stop ND filter to lower the shutter speed to a few seconds. This is enough to create silky smooth waterfall images. The 10 stop filters are useful for the dreamy long exposure images with several minutes of exposure time.

Using a shutter speed of 5 minutes and 40s and a 10 stop ND Filter the clouds and the ocean to the left becomes silky smooth and dreamy - Photo by Peter Dam
You can also find graduated ND filters, which provide transitions between multiple darkness levels, and variable ND filters, which provide a fixed range of darkness levels. Graduated filters are helpful when you have a bright sky that you want to darken to avoid overexposing it. They do work best when you have an even horizon line.
4. Use Leading Lines
One of the most challenging parts of landscape photography is to preserve the feeling of a 3D space. You need to create a sense of depth and connection between the foreground and background that invites the viewer into the scene. The layers of the landscape should be connected, and leading lines are the best way to do this.

Photo by Peter Dam
Leading lines capture the viewer’s attention and walk them through the frame. They may be horizontal, vertical, or diagonal; curvy or straight; thick or thin; colorful or monochrome. Most landscapes have at least one line, the horizon, but most have more than that (e.g., the separation line between mountains and the sky or the ocean and beach, trees, rivers, etc.). It’s up to you to position the camera in such a way that the natural lines of the landscape become leading lines.
The easiest way to create a sense of depth is to have a leading line from the foreground to the background. A river or a shoreline is perfect for that. Don’t forget about the rules of the composition, either. For example, place the horizon at one-third of the frame to create a more appealing composition according to the rule of thirds. Or place the focal point of your composition along a strong diagonal leading line according to the golden triangle rule. Knowing where to place the focal point and how to use leading lines to make the viewer explore the entire frame is the secret of good landscape photos.

Photo by Peter Dam
To make things easier, decompose the scene into individual elements and see the landscape as lines, shapes, patterns, and colors. Take a moment to notice what speaks to you and what story you want to say. Then compose the frame placing the main subjects in the best positions. Landscape photos aren’t just a representation of a large, unique subject. They’re complex compositions, and each element should have a clear role.
5. Shoot During the Golden Hours
The golden hours roughly represent the first hour after sunrise and the last hour before sunset. During this time, the sun is very low in the sky and provides a soft light that glazes everything in orange, red, and yellow shades. While the low intensity of the light may require some exposure adjustments (e.g., a slower shutter speed, a higher ISO, etc.), the color and texture of the light provide endless sources of inspiration.

Photo by Peter Dam
For landscape photography, the golden hours are the best times of the day. The low position of the sun provides shadows, enhances contrast, and creates an atmosphere. The golden shades of the light transform the landscape into a fairyland, create dramatic skies, and make rivers and mountains shine alike. Furthermore, the light is changing so fast that you have a new scene every two minutes.
The ecosystem is also different during the golden hours. In the morning, you may find dew, frost, or mist. In the evening, you may capture stunning sunsets. Wild animals and birds may be more active and provide captivating characters for your photos. And the serene silence of these moments will definitely be an inspiration.
Concluding words
Landscape photography is about capturing the beauty of the world. Your photos should be natural-looking, sharp, and evocative. You should focus on preserving natural colors, details, and geometry. Creating a sense of depth, a 3D space that invites the viewer to walk through the frame virtually, is key to great landscape photos.
As a general rule, avoid over editing your photos and exaggerating contrast and colors. Instead, use different lenses (wide-angle and telephoto), filters (ND-filters, polarizing), and shooting angles to create your best photos in the camera. Take time to explore nature, understand its cycles, and reveal unique moments of our surroundings.
About the author: Peter Dam is a professional nature photographer who loves to explore everything from the small world of macro photography to the vast landscape photography. He shares guides to Affinity Photo and image management in both Lightroom and Capture One on his website.

Photo by Peter Dam