

Over the past year, we have teamed up with our friends at Macphun to bring you a series of Outside Views Photo Contests. Each contest has had a unique theme based on photographs taken... well... outside! Our last contest in this series is Adventure Land, which will be judged by famed Adventure Photographer Jay Goodrich. The grand prize of the entire series, only available to those who enter the previous contests, is a fantastic workshop with Pro photographer, author and speaker, Rick Sammon. After the Adventure Land contest ends, Rick will select the Best of Show out of all six contests! The winner will receive airfare (from major airport in the continental U.S.), hotel and workshop fees in Rick’s upcoming photo workshop, in Croton-on-Hudson NY, May 19-21 2016.
Download a free trial of Macphun's Aurora and Creative Kit, link below.
Aurora HDR
Creative Kit 2016
We all love the great outdoors, and we all love great pictures of the great outdoors. In this post, I’ll share with you my absolute top tips for making—not just taking meaningful outdoor photographs.
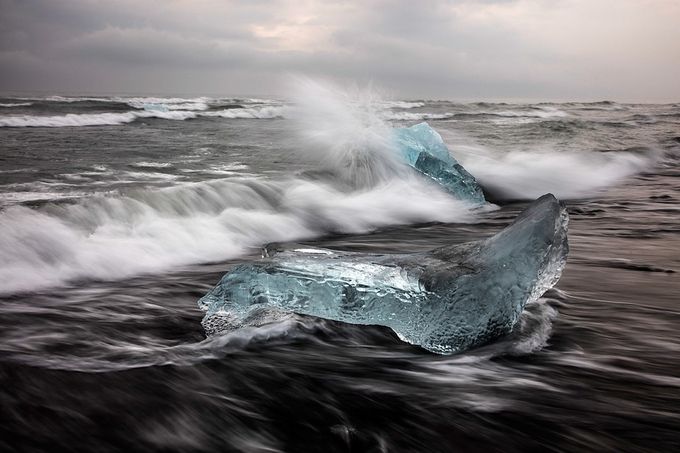
1 – The ND filter advantage. Neutral density (ND) filters reduce the amount of light entering your camera. If you want to blur water (or the movement of any subject) during daylight hours, you’ll need an ND filter. Fixed and variable ND filters are available. Pros use fixed ND filters because they don’t produce “banding,” which can happen when using a variable ND filter. Photograph: Iceland.
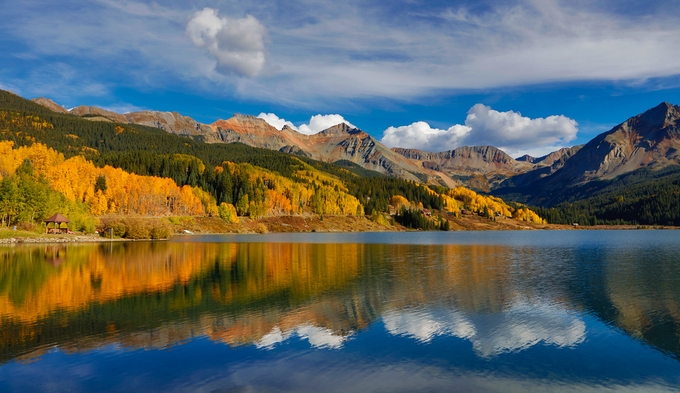
2 – Pack a polarizing filter. Polarizing filters can reduce glare on water and on foliage. They can also darken a blue sky and whiten white clouds. Polarizing filters do something else: They can make your photographs look sharper . . . by reducing glare on atmospheric haze. (The Dehaze filter in Lightroom and Photoshop can reduce the effect of haze, too.) Photograph: Telluride, Colorado.
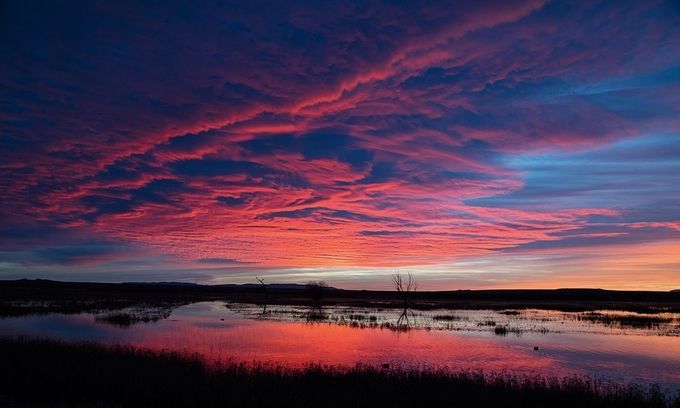
3 – You snooze you lose. Sure, you can get good images at midday, but you’ll get the most dramatic colors (and shadows) before sunrise and after sunset. When photographing in these low-light hours, you’ll need a tripod to steady your camera – if you want to shoot at a low ISO (for minimal digital noise in your photograph). Use sun-finder apps to help you find the best light, including the direction of light. Weather apps can help, too. Photograph: Bosque del Apache, New Mexico.
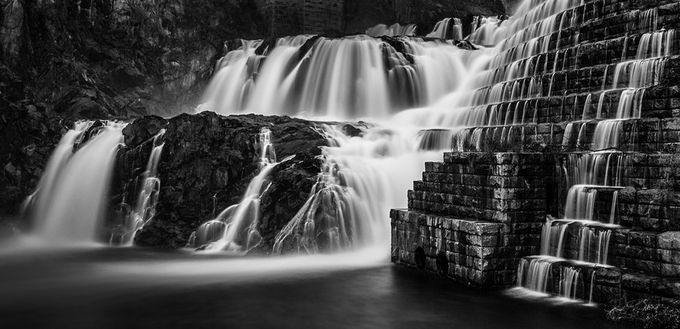
4 – Remove reality. When we remove the reality (the color in this case) from a scene, a picture can, but not always, look more creative and more artistic. When converting a color file to B&W, know that contrast becomes very important. If you boost the contrast a little, I think you will like your image a little better. I used Macphun’s Tonality CK to create this image. Photograph: Croton-on-Hudson, New York.
5 – See eye to eye. When photographing wildlife, try to both see and shoot eye-to-eye. That is, on the subject’s eye level. When you shoot eye-to-eye, a person viewing your photograph can relate more to the subject than if you are shooting from above or below the subject. Photograph: Kenya.

6 – Focus on the action. When photographing fast-moving subjects, set your camera on focus tracking (AI Servo Focus or Continuous Focus). In that mode, the camera/lens will track the subject right up to the moment of exposure, keeping your subject in sharp focus. Photograph: Mongolia.

7 – Try HDR. If you want to see into the shadows, without having the highlights blown out, you need HDR (high dynamic range) photography: the process in which you take several photographs at difference exposure settings. Then, using an HDR program such as Macphun’s Aurora HDR, combine them into a single image. Photograph: The Palouse.

8 – Think like a painter. Don’t get locked into standard picture formats, that is, 8x10, 11x14 and so on. Think like a painter and crop your image so that it includes only what you want to include in the image area. Photograph: Iceland.

9 – Compose carefully. I truly believe that composition is the strongest way of seeing. Composition can also make or break a photograph. Usually, dead center is deadly. Therefore, it’s best to compose a picture with the main subject off center. Photograph: Alaska.

Visit Rick Sammon's website for workshops and more tips, www.ricksammon.com. Also, check out Rick's latest interview.