
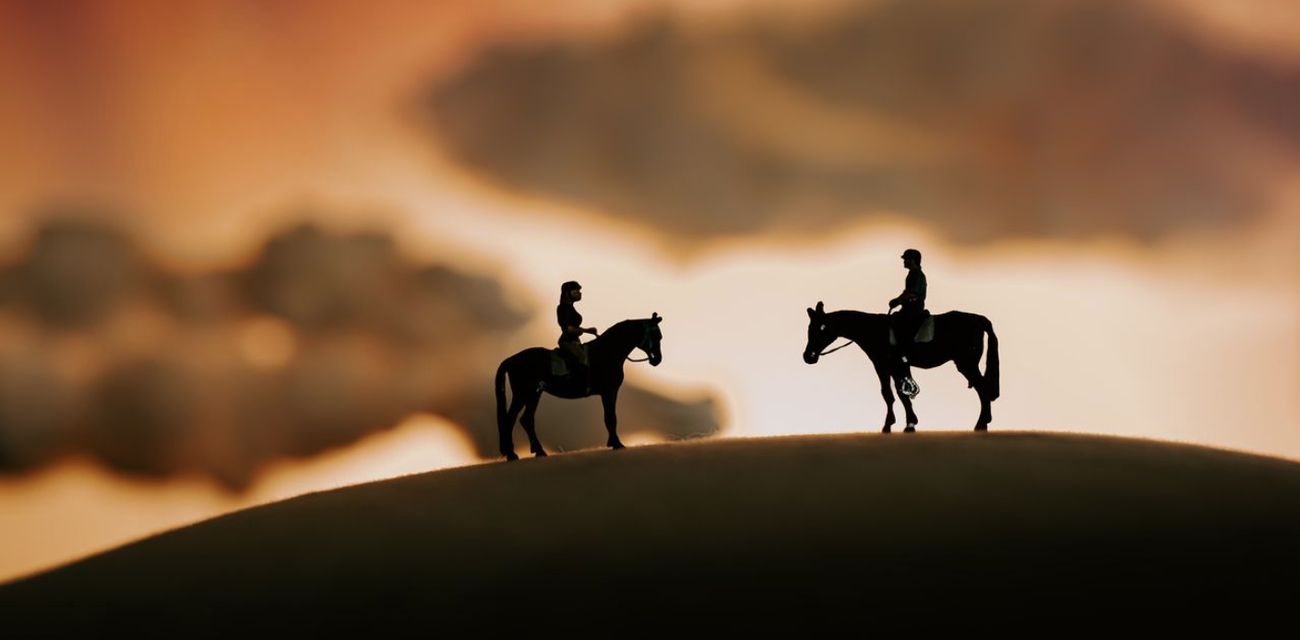
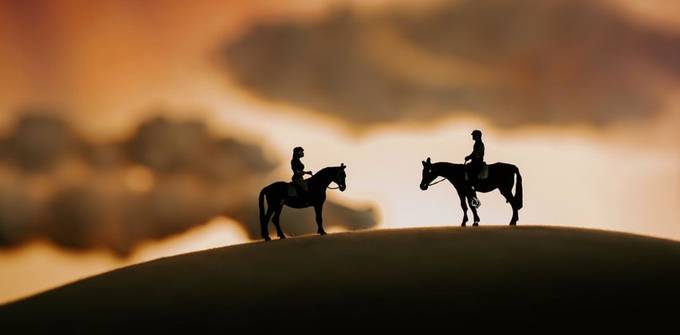
Here is a quick "how-to" to viewbug community member Al Baker's miniscapes. Al is an adventure, travel and landscape photographer and will teach you on how you can easily capture these engaging miniscapes.
The nice thing about doing these miniature scenes is that anybody can do it. It wasn’t until recently I realized that miniature photography is a perfect place for a beginner to start. You don’t need a fancy studio. You don’t need a fancy camera. All you need is your imagination, creativity, and some basic household items!
Equipment Needed:
Hobby Train Figures: These are the main subjects for all my photos. I get asked all the time where to get them. I always recommend shopping local and try to check out the local hobby shops. If they do not have them, there are some websites online that sell thousands.
Camera: You don’t need professional gear to get the shot. There are some amazing miniature photographers that take all their images with an iPhone. However, I do find it easier to play with the depth of field when using a camera with interchangeable lenses.
Lens: The depth of field is something that brings the mini to a more realistic light. A lens with a wide aperture is what I find easiest to achieve. Personally, I use a…
Sigma 50mm f/1.4, Sony 16-35mm f/2.8, Sony 70-200mm f/2.8
Now, those are what I use, but not what is needed. The apertures I usually have set for my images are between f/2.8 and f/8. Another type of lens is Macro. Macro lenses are actually made for this kind of stuff and I have used one for a couple of my photos.
Tripod: Tripods are probably the most important when it comes to my images. When I set up to make a scene, the first thing I set up is the camera and tripod. This allows me to adjust for the exact framing I want and to be able to go back and forth from camera to scene so that the subjects used are inside the frame.
Settings:
Depth of Field: “The distance between the nearest and the furthest objects that give an image judged to be in focus in a camera.” That’s the Google definition. Let’s break it down in a more simple way. Set up your camera, set it to a wide aperture, and grab three random objects. Anything that can fit within the frame. Place an object closer to the camera, more preferably to the left side of the frame. Now place an object further from the camera towards the right side of the frame. Lastly, take the third object and place right in between the two previous objects and center it in the frame. When you manually focus on the middle object, the blurred effects of the other two objects create the depth of the field.
Manual Focus: Turn your auto-focus off. When you have your main subject in place, zoom in on the viewfinder. Turn the focus ring until your main subject is in focus. Now you can leave it until you are ready to shoot your shot! Another reason it is nice to have a tripod!
Aperture Priority Mode: When you set your camera onto AP, the shutter speed becomes automatic. This is one less thing to worry about during your set up. Just find your preferred aperture and shoot.

The Scene Set-Up:
Approach: There are two ways I come up with ideas. I’m constantly looking at photos from amazing landscape/travel photographers online all the time that inspire me. When I see their photos, I look at all the elements in the image and visualize in my head what I could use to mimic them. The most commonly used example is aluminum foil as water. I’ll give a list of examples below.
How To Use Which Lens And When: Each lens has a different effect. These are basic things to know while you are out in the field as well.
50mm f/1.4 : This is the most common lens I use when I shoot minis and possibly the most common focal length for any type of photography. It’s called the Nifty Fifty for a reason! It’s pretty neutral in my opinion as far as compression, close focus distance, etc. Because of the very wide aperture, I use this a lot in the low light stuff.
16-35mm f/2.8 : Wide angles are exactly that. They are super wide and fit in way more than enough. They work best when I am using an enclosed scene, such as a canyon or a cave. These have a close focal distance (for not being macro,) which means you can be very close to the main subject and still be in focus. It makes the scene appear much bigger than it really is.
70-200mm f/2.8 : This is one of my favorites to use. This lens creates a phenomenon called compression in which the background appears to be closer to the subject and larger in scale in comparison to what it actually is. For instance, using a background for a sky gets easier because whatever you use becomes compressed and fills in the whole frame.
Macro: Macro lenses have the capabilities of shooting objects extremely close to the camera. The close focusing distances can create images that are otherworldly and bring unnoticed details to life. I would say a macro lens would be most suitable for miniature photography and kind of wish I had one.

Objects Commonly Used:
Floor Lamp: Sun
Floor Mat: Tall Desert Grass
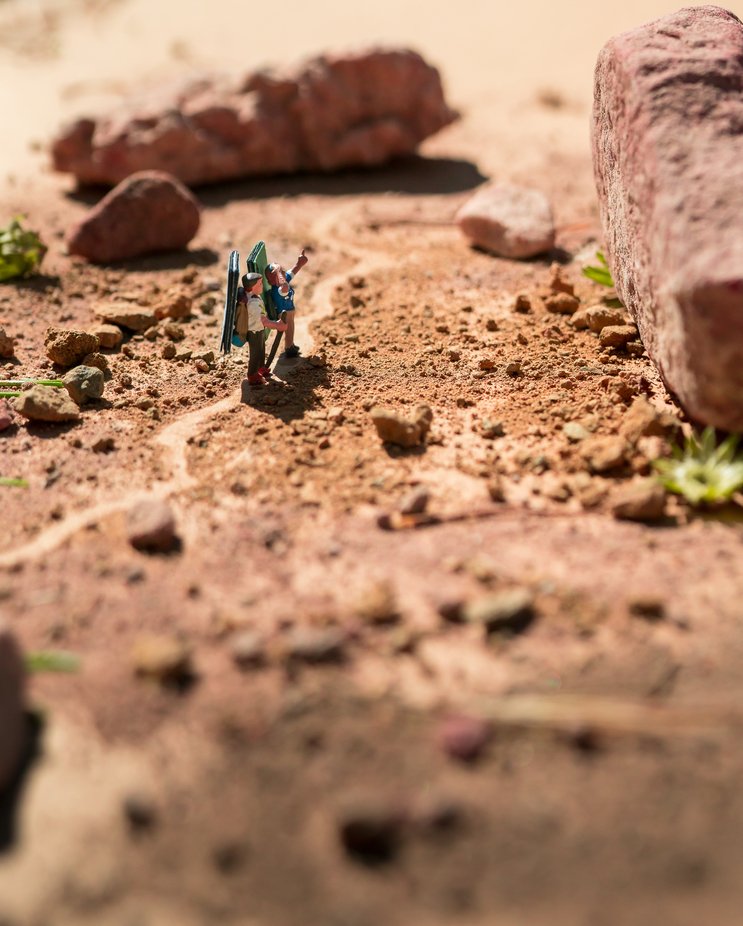
Dirt/Rocks: Actual Dirt/Rocks
Picture Frame: Water/Reflections
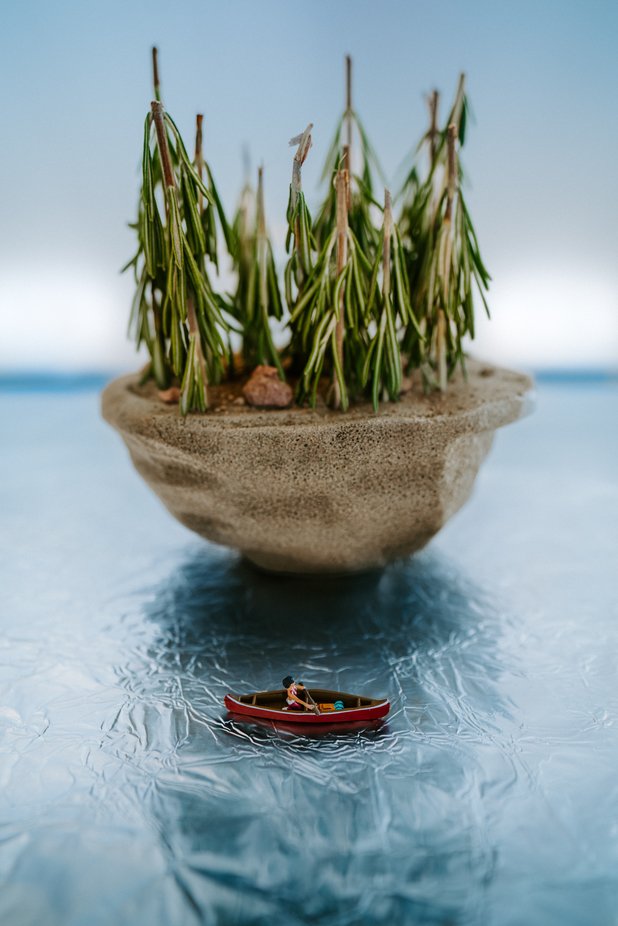
Aluminum Foil: Water
Wrapping Paper: Mountains or Canyon Walls
Baking Soda: Snow
Rosemary: Trees
Docks/Walkways: Popsicle Sticks

Miniature photography takes a lot of trial & error. Just like any other genre, there are a lot of aspects that come into play to create a good image. The greatest advantage here though is you can do it all in one place. I’ve learned so much from this and easily carried it over to the real world. Trial & error takes way more time (and travel,) in the field and you can create so much more in that time. All while teaching yourself all the rules of photography. Just keep one thing in mind when creating your own style… There are no rules in photography.