

Star trails are arguably easier to accomplish as you get a much longer exposure window making it easier to keep the ISO down. Get ready to pack your camera bag you’ll want to stay out all night star gazing after reading this. Photographer Jamesrushforth shares some great tips on how to get started on capturing the star trails.
Composition
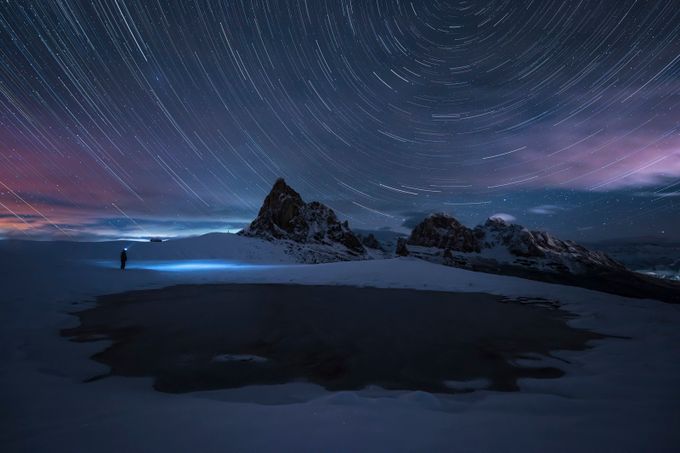
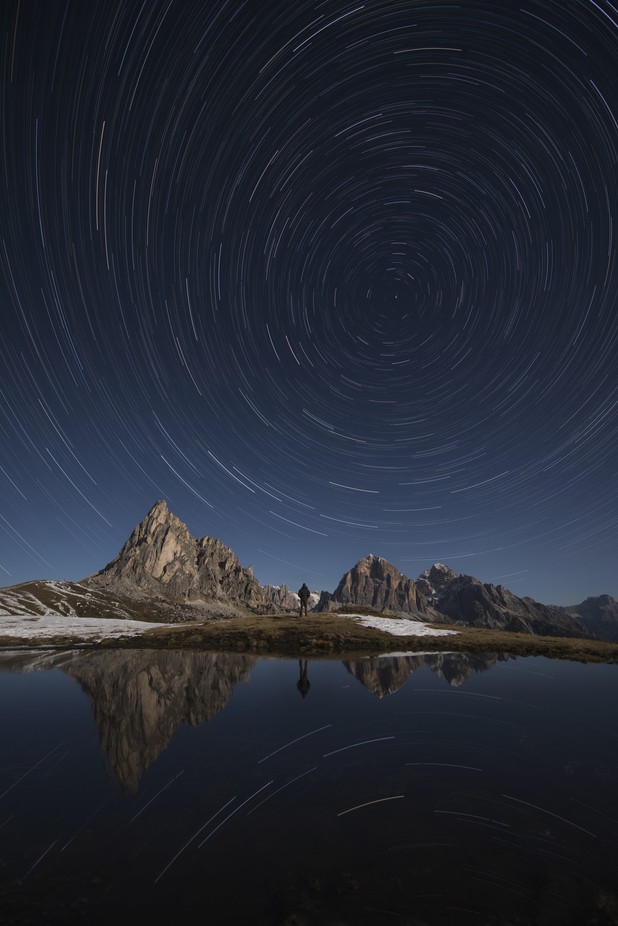
Star trails normally look most effective if you can get the North Star (Polaris) in the shot. This is because the North Star lies in an almost direct line with the North Pole and the axis of the Earth’s rotation. Thus Polaris remains almost motionless in the sky whilst all the stars of the Northern sky appear to rotate around it.
The North Star is in fact the 50th brightest in the sky and is most readily found by first locating the easily identified Plough (big dipper) asterism of the Ursa Major (great bear) consolation. The righthand two stars of the ‘saucepan/plough‘ then point almost directly at the North Star.
There are then two ways of creating star trails:
1) A single long exposure
I generally prefer this method if there are some clouds in the sky as you get a nice ‘moving effect’ without losing the star trails as they pass over. This method also requires less post processing after. However as you only end up with a single image at the end there is less options and flexibility
for editing - for example a single bright light (like car headlights) will ruin the image; where’s if you use multiple stacked exposures (see below) you can just remove the over exposed images as the car passes.
Some argue a single exposure offers a ‘purer’ image that is less dependent on ones post processing abilities; this is however of course personal preference.
Camera settings (EXIF)
Focal length - As above, the more you're zoomed in, the faster the stars will appear to move. In the case of star trails a large focal length is not a problem, as it’s the movement you want to capture.
Exposure - How long an exposure you decide on will depend on your chosen focal length and how big you want the trails to be. As a rough example on a full frame at 14mm I tend to go for about 40 minutes. At 200mm I tend to do about 15 minutes.
To get an exposure over 30 seconds on most cameras you will need to use 'bulb' mode in conjunction with a remote release switch to keep the shutter open (holding the shutter button manually for 40 minutes gets tedious!)
Aperture - Generally you want a fairly wide aperture (low F number) to get lots of light in and ensure the stars are bright. However with such long exposure times (see above) you can afford to stop it down slightly to improve corner sharpness.

ISO - Again you're looking to get the ISO as low as possible to reduce noise in the dark areas. For a 40 minute exposure you may well be able to get the ISO down to 100. If it's a particularly dark night however you may well lose the foreground.
Example settings - It's much harder to give example settings for long exposure star trails as there's a huge variety of set ups depending on what you want to achieve and the amount of light at the time. Ultimately you will need to experiment.

2) Use 'stacking' software
This involves taking a series of photos, usually at 30 second intervals for a minimum period of roughly 15 minutes. You then stack the photos to create a star trail. This is most commonly (and arguably best) done in Adobe Photoshop, but there are many different software possibilities:
Imagestacker: https://www.tawbaware.com/imgstack.htm
StarStaX: https://www.markus-enzweiler.de/software/software.html
StarTrails: https://www.startrails.de/html/software.html
There are numerous possible ways of doing this but the easiest is to dial in a 30 second exposure (lens wide open with an ISO between 400 and 3200), put your camera into continuous shooting mode and then hold the shutter open with a remote release and let it take photos for x amount of time.

Some departing tips to save you time:
• Learn where your infinity focus lies for each lens.
• Come up with a suitable composition in daylight. If you need to do it at night use the highest ISO you can.
• Test your head torch before setting out. Make sure your camera battery is charged.
• Learn to operate your camera in the dark without a head torch.
• Find a friend - night photography is a lonely business. If you can't persuade anyone to join you, take an audio book.
• Use a decent tripod.
• Learn to find the North Star.
• Find a dark spot away from light pollution.
• Find a good weather forecast.
• Get a sunrise / sunset app as well as a lunar cycle app.
• Tell someone where you're going and roughly what time you'll be back.
• Pack lots of warm clothing.
• If you use long exposure noise reduction remember to turn it off if you do a 40 minute star trail.
• Make sure you know how to get home in the dark.

Some more advanced tips:
• Experiment with stitching static stars, remembering that the galactic core is often located straight up.
• Have a look into post processing methods to reduce noise.
• Look into 'mirror up' and 'long exposure noise reduction' for shorter exposures.
• Experiment with a decent flash and some colored gels for some interesting foreground effects.
• Consider two different focus points for well-lit foregrounds.