
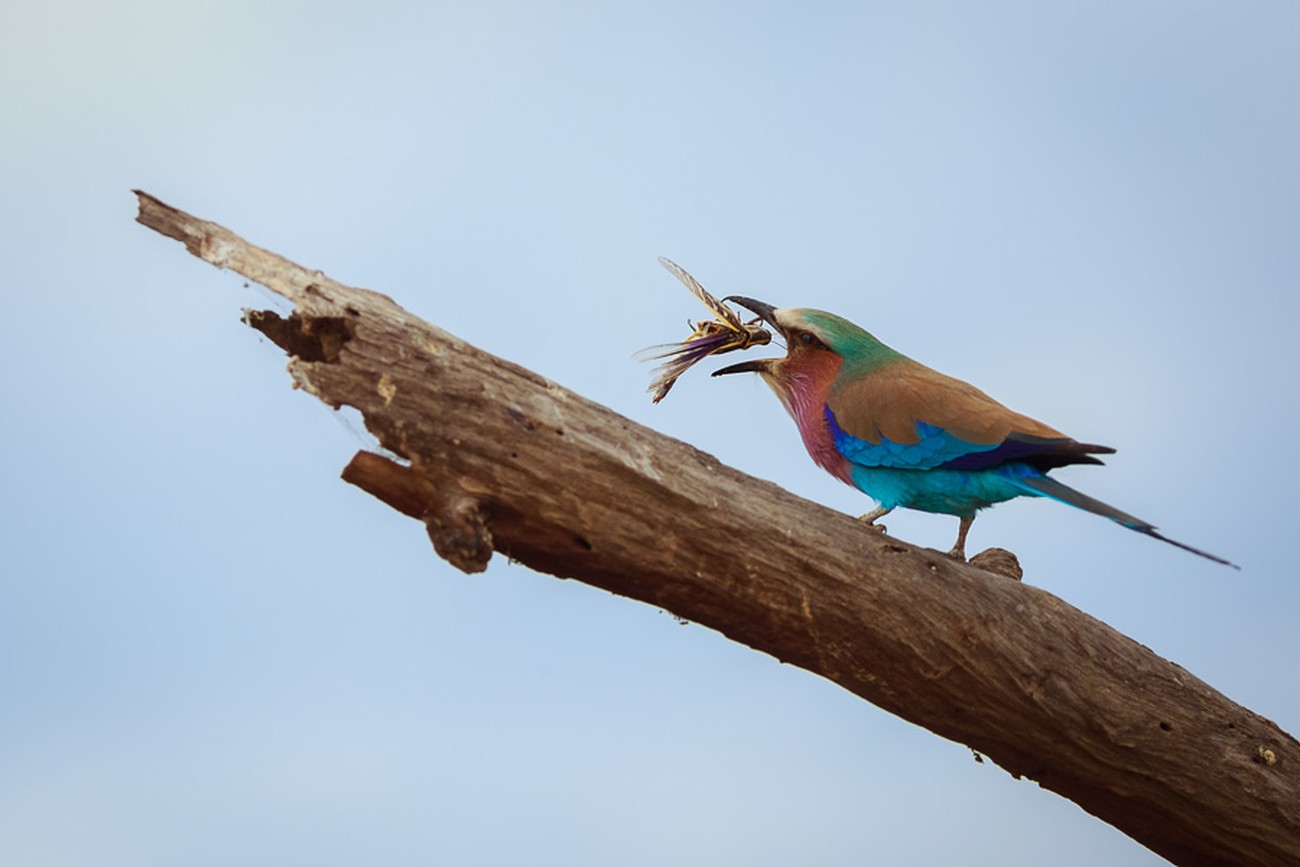
Bird photography can be incredibly rewarding when you get that special shot – the one with the bird in sharp detail doing something interesting with no distracting elements in the background. But it can frustrating trying to get that shot, waiting for all the factors you need for a great shot to come together.
This tutorial will help you understand the challenges and get prepared. And, with some patience and practice, you’ll soon be on your way to making memorable photographs of our feathered friends.

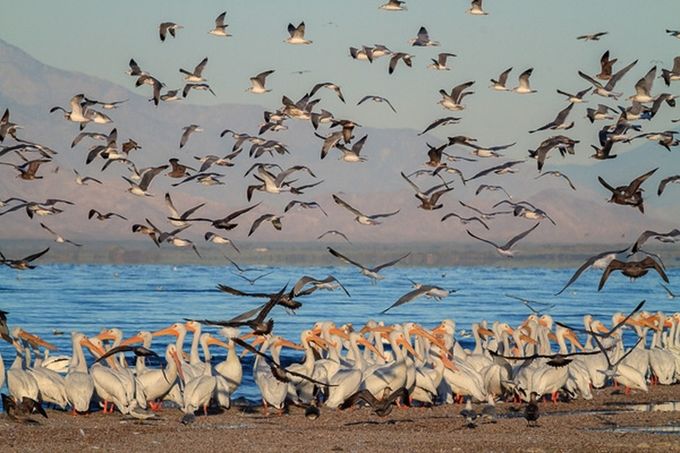
Canon 6D, 400mm, ISO 1000, f/5.6, 1/4,000 second
The Challenges
Even though you can find birds almost anywhere, they are not always exactly where you want them to be when you want them to be there. When your goal is to photograph birds, they have a way of disappearing on you. But don’t worry, I’ll help you find them.
Another challenge is that birds are always moving, which means you have to react quickly and leave enough room in your frame to allow for the movement, or they can quickly get away from you.
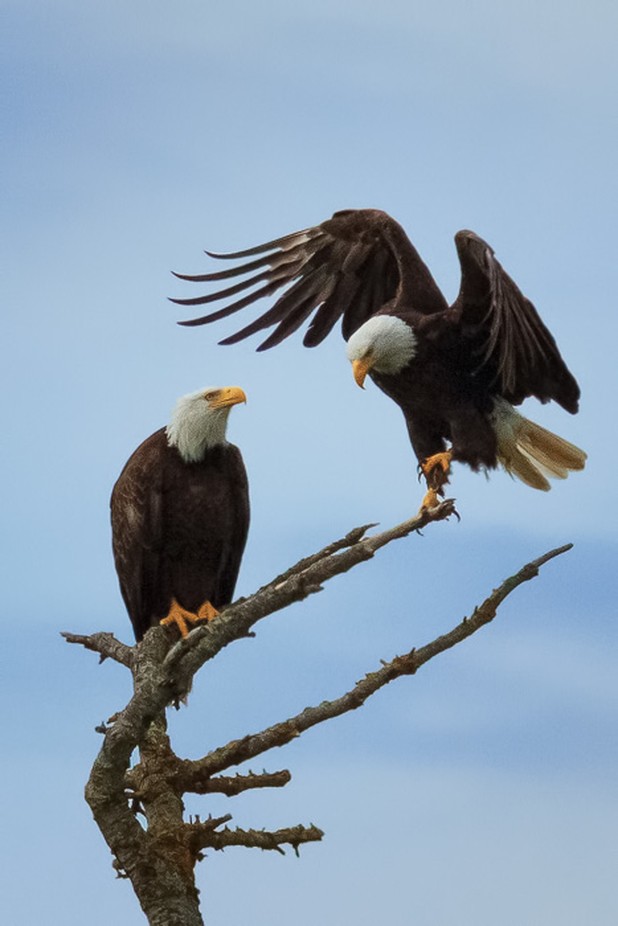
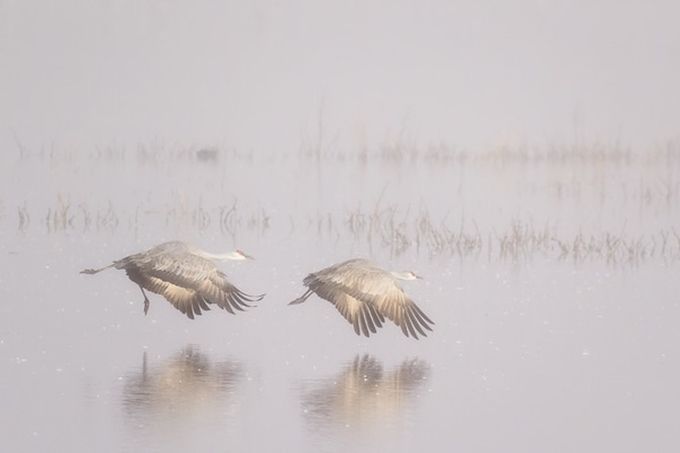
Canon 7D, 400mm, ISO 800, f/8, 1/5,000 second
There’s a lot more to bird photography than using a long lens. It requires a lot of patience, being able to be still and quiet, and probably enduring some bug bites along the way. But, with a few techniques under your belt, you can overcome these challenges and start making great bird photographs.
Types of Bird Photographs
Freezing the Action
As I mentioned, birds are always moving. Even when they appear to be standing still, they will have slight twitches, the wind will blow their feathers, and they are likely to move suddenly. For that reason, you should use a fast shutter speed when birds are your subject. I recommend at least 1/500th of a second for a bird that isn’t moving much, and 1,000th of a second for a bird in flight.
You can use shutter priority mode to ensure your shutter speed doesn’t fall below the speed you have chosen. Or, you can stay in aperture priority to control depth of field, and just keep your eye on your shutter speed, increasing the ISO if the speed gets too slow.
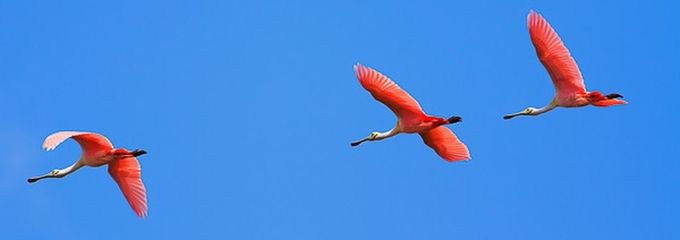
Canon 7D, 400mm, ISO 200, f/5.6, 1/1,250 second
Blur the Action
Freezing the action isn’t a hard and fast rule, especially if you like to make abstract photos. Feel free to try some motion blurs by using a slow shutter speed. This will take a bit of experimentation to determine what the right speed is depending on how fast the bird is flying. I recommend starting at about 1/25th of a second and going from there.
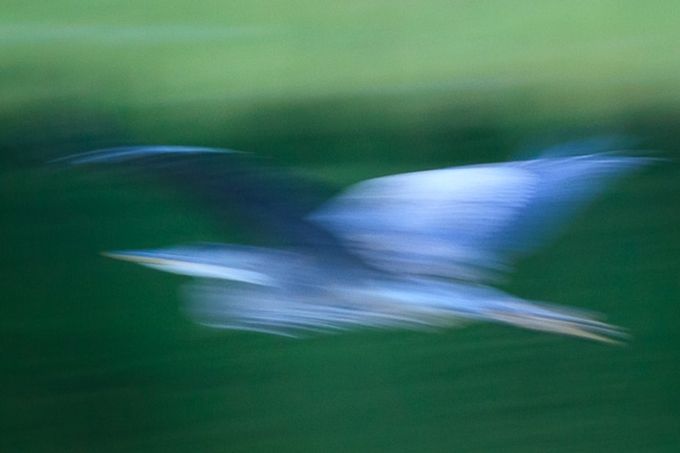
Canon 7D, 400mm, ISO 1200, f/5.6, 1/25 second
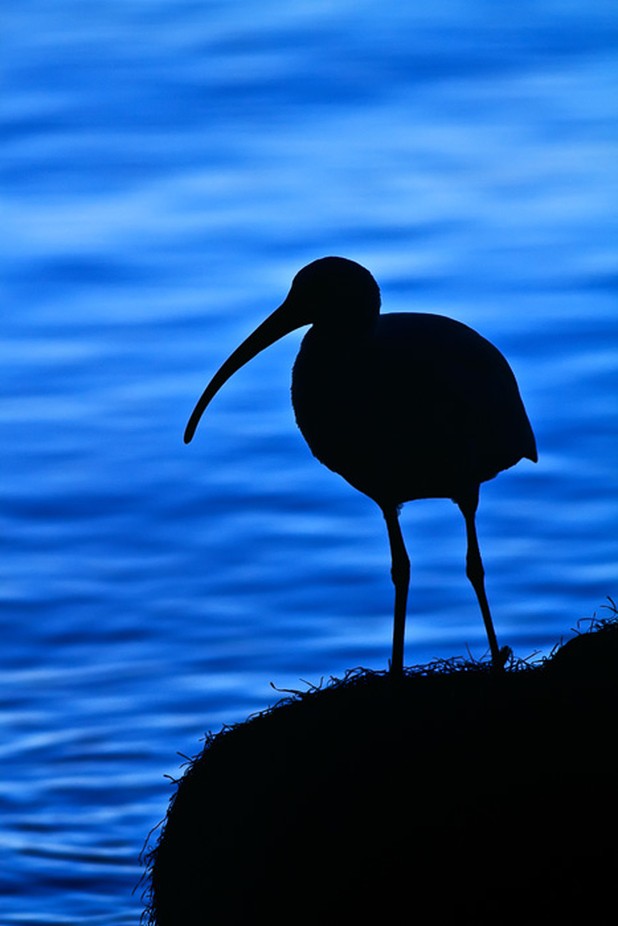
The Silhouette
When your bird has a great shape (like most birds do) and you have a bright background, consider making a silhouette by exposing for the background and letting the bird go completely black. To do this, use spot metering and meter on the background.
Canon 7D, 400mm, ISO 1200, f/5.6, 1/25 second
The Silhouette
When your bird has a great shape (like most birds do) and you have a bright background, consider making a silhouette by exposing for the background and letting the bird go completely black. To do this, use spot metering and meter on the background.
Canon 7D, 400mm, ISO 400, f/5.6, 1/2,500 second
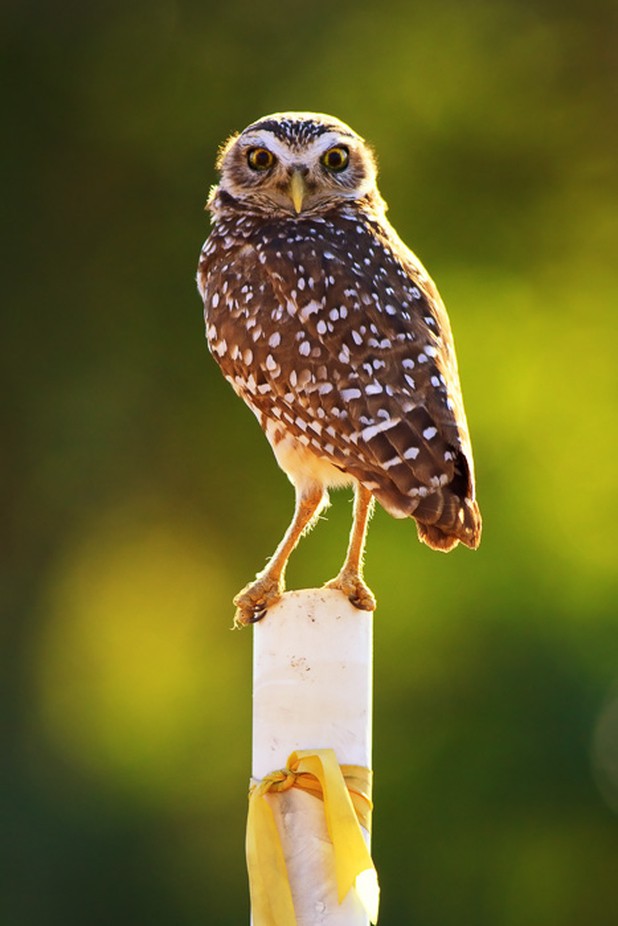
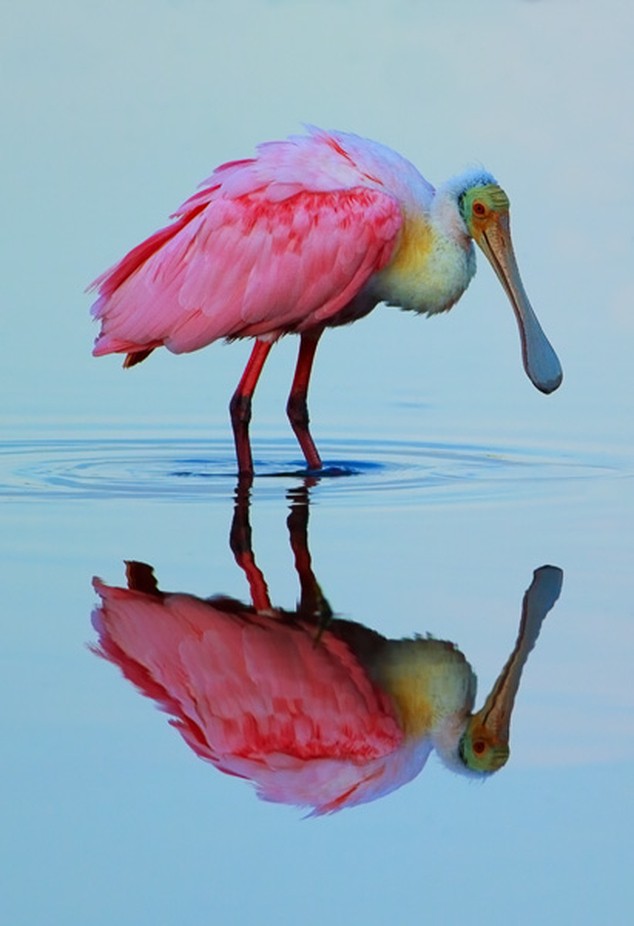
The Portrait
The colour and texture of a bird’s plumage make them such fascinating subjects for photography that a simple photo of a bird on a perch can be captivating. Use a shallow depth of field by using a wide aperture like f/5.6 or f/2.8 to blur the background.
Canon 7D, 400mm, ISO 400, f/5.6, 1/,000 second
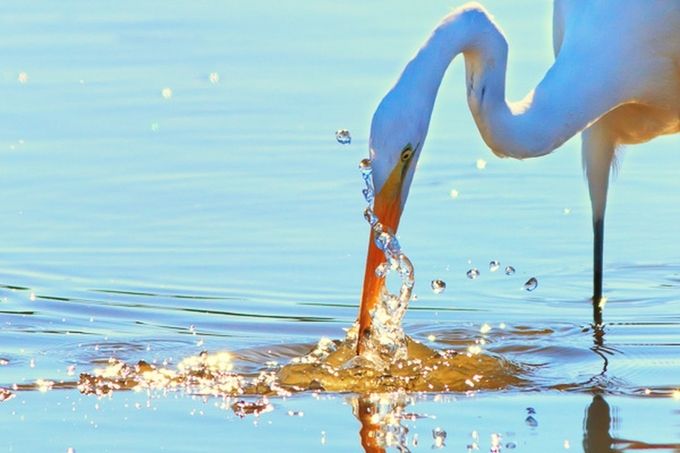
Capturing Behaviour
The most interesting bird photographs are the ones that show behaviour such as fishing, feeding their young, taking off in flight, landing, or swimming and flying in a pattern. You’ll have to spend some time watching the birds to discover the behaviour so you’re ready for it ahead of time.
When I photographed this egret fishing, I watched it for awhile and noticed that it made a very slight head movement right before it attacked the fish. Once I discovered that, I was ready for the shot every time.
Canon 7D, 400mm, ISO 640, f/5.6, 1/5,000 second
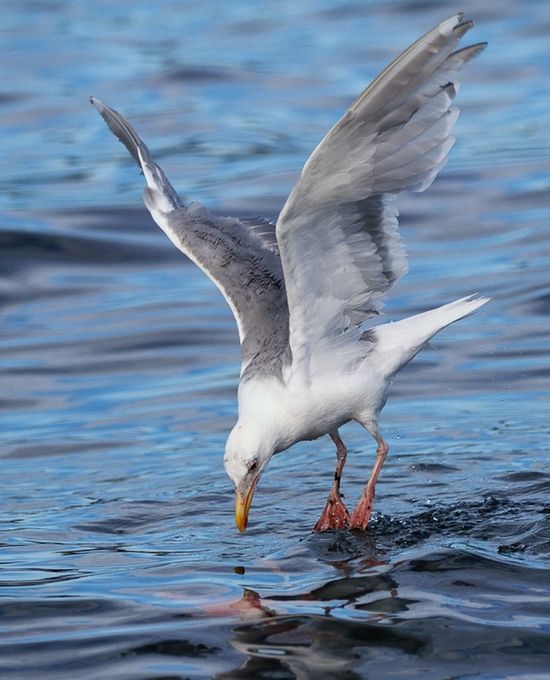
Finding Subjects
Sometimes the best opportunity for photographing birds is right in your own back yard. When you’re at home, make sure you’re ready for the hawk that lands on your fence or the quail in the garden by having your camera with a telephoto lens handy with all the settings dialed in ahead of time.
Other places to find birds are estuaries, forests, wildlife preserves, bird sanctuaries, lakes, rivers, raptor centres, and even zoos. Remember, it doesn’t have to be an exotic bird. Crows, seagulls, and geese are all excellent subjects.
Small birds tend to move faster and can be more difficult to catch in your frame. If you’re just starting out with bird photography, try going after some larger birds first. Some birds, like seagulls and geese, are more familiar with people and will be easier to get close to than others.
Canon 7D, 155mm, ISO160, f/2.8, 1/3,200 second
Birds are easily spooked, but there are several things you can do in the field to improve your chances of getting close to your feathered friend:
- The better your camouflage, the more likely the birds will come near you. Cover your camera with a green or brown sweater to mask its strange appearance.
- Wear neutral clothing and avoid bright colours.
- Make sure to remove or cover all reflective objects on and around you, including your equipment, camera bag, cell phone, and any jewelry you might be wearing.
- If you are going to try to approach a bird, keep a low profile. Don’t approach them directly, but rather move toward them in a zig-zag pattern. Keep very quiet and avoid making quick movements and startling them.
- Birds often choose favourite perches. Even if it flutters off before you can get your shot, if you wait silently for a few minutes, it may come back.
- Birds are easily startled, so a beeping camera can frighten them away. Turn off any beeps your camera might make.
- The same goes for flash – turn it off or your bird will be startled by your first shot and quickly leave.
One technique I find helpful when it comes to photographing birds is to find a location where birds are likely to be. If they are not there when you get there, don’t worry, that could be a good thing. Find a way to hide yourself by sitting behind something and wearing clothing that blends in with your background. Try to find a spot that will give you a good view of your potential bird with a clean background. Then sit, be still, don’t make any sound, and wait. This is where the patience comes in to play! The better your hide yourself, the safer birds will feel coming near you.
Recommended Camera Settings
- Continuous high speed drive mode.
Most digital cameras will allow you to switch between single shot, continuous, and continuous high speed mode. Since birds move so quickly, choose continuous high speed and take lots of shots when the action starts.
- Fast shutter speed
Again, birds move quickly, so choose a shutter speed between 1/500th and 1/1,000th of a second.
- High ISO
Remember it’s better to have a noisy image than a blurry image. Keep your ISO high enough to allow a fast shutter speed. You can always reduce noise in post processing later.
- Wide aperture for shallow depth of field
A busy background can cause clutter and distractions in your image. To keep all the attention on your main subject, use a shallow depth of field and blur the background as much as possible.
Canon 7D, 400mm, ISO 800, f/14, 1/1,000 second
Capture an interesting moment – in great light – with a clean background. That’s the recipe for success.
Remember, spend some time observing your subject and get to know its behaviour. When you spot your subject, think about what it’s going to do. Where is going to fly? What direction is it moving in? Will it have a better background if you wait just a moment? Is some kind of behaviour about to happen?
Equipment Choices
When it comes to photographing birds, a long lens is the key. Even with big birds, getting a closer perspective can make or break an image. But that doesn’t mean you’re out of luck if you don’t own a big lens. There are options for you.
First, make the best of what you have. Even if your longest lens is only 100mm, you can photograph the kinds of birds that are likely to get close to you such as birds that arrive at your feeder, in your backyard, or birds that are used to people like ducks and geese.
Second, you can rent a lens. I highly recommend this option. In fact, most of the photos I put in this tutorial were made with a lens I rented. After I rented the lens 3 times, I finally decided it was worth it for me to make the purchase. But I still rent lenses when I need a specific lens and it’s very cost effective (especially when you consider the price of a good lens). Plus, I always have the exact right lens for the job.
So, how big of a lens do you really need? Generally, the longer the better for maximum magnification. But keep in mind that lenses get remarkably heavy – if you’re hiking up a mountain, it might not be practical to carry an extreme telephoto lens, which can weigh in at over 10 pounds.
A 70-300mm zoom lens is one of my favourites because it is very versatile and some of them are fairly lightweight. But you’ll get a sharper image with a fixed focal length lens. I recommend trying out a 300mm or 400mm fixed lens.
Canon 7D, 400mm, ISO 400, f/5.6, 1/2,500 second
The extra weight of a long lens will increase the likelihood of hand shake blur, which will then be magnified by the distance between you and your subject. If you’re working with a heavy lens, a tripod or monopod will be a great benefit for taking the weight of the lens. If you want the increased flexibility you’ll get by not using a tripod or monopod, be sure to use a very fast shutter speed to compensate for the hand shake blur.
Getting sharp focus
One of the most challenging things about bird photography is getting a sharp image and there are many factors that go into achieving it.
Some people use manual focus, and if you are good at that, that’s fine! I stopped using manual focus 20 years ago because I’m terrible at it. Ever since I started wearing glasses full time it takes me too long to focus. It’s one thing if I have all day doing a macro shot on a tripod, but for moving subjects, there’s no way I would risk using manual focus. But again, if you are good at it, by all means use it. For the rest of us understanding the various auto focus settings in our camera is essential.
Auto Focus Mode
Most cameras have three different focus modes:
- One Shot – obtains focus once when you press the shutter half way down
- AI Servo – continually focuses on the subject as long as you hold the shutter down
- AI Focus – combination of One Shot and AI Servo – your camera decides whether the subject is moving or not
For bird photography, I recommend using AI Focus since it will work well whether your bird is standing still or flying.
Auto Focus Drive
The drive mode on your camera determines how many shots are fired when you hold the shutter down.
- Single Shooting – pressing the shutter button will fire one shot. This is good for landscapes or when there is not much action.
- Continuous Shooting – pressing and holding the shutter down will fire multiple shots at a relatively slow rate.
- High-Speed Continuous Shooting – will fire multiple shots as fast as the camera can go. This is different depending on your camera model.
Birds move quickly, so the best option for this type of photography is high-speed continuous shooting. You might be surprised to find that every frame is a little bit different even at 11 frames per second (fps).
Auto Focus Points
Your camera can have anywhere from just a few to 65 or more focus points that it is capable of using to achieve focus. You can allow your camera to decide where it should focus using one of the auto-select modes where multiple focus points are active and the camera decides where to focus. These days cameras are coming out with more and more focus points for this purpose.
You should do some tests and experiments with your camera to decide how well your camera does this job. For me, I don’t let my camera decide. I always use a single focus point so it is always in my control. In fact, I rarely even change my focus point, I just use the center one all the time – even though my main subject is rarely in the center.
I use a rather old fashioned method of focussing but it really works for me so I’ll share it with you in case it helps. Rather than changing the focus points on my camera all the time, or using multiple focus points and hoping the camera settles on the right one for the scene, I set mine to spot focus on the center point. I point my camera directly at what I want to be in focus and press the shutter half way down to set the focus. Then, while holding the shutter half way down, I recompose the image and then shoot. That way I can make sure that the part of the frame I want to be in focus is in focus no matter where in the frame that spot is. This is actually very quick to do once you get the hang of it.
I encourage you to try the different methods and decide which one works best for you.
Canon 7D, 400mm, ISO 200, f/5.6, 1/500 second.
Image Stabilization
Any time you are not on a tripod, image stabilization always helps.
Where to Focus
For bird photography, always focus on the eye of the bird. Even if you are using a very wide aperture and only part of the bird is sharp, if the eye is sharp it will look good. If the wing is sharp and not the eye, it wont look right.
Exposure Lock and Back Button Focus
In my view, part of the difficulty in getting a sharp image lies in the fact that the shutter button does too many things. Not only does it trip the shutter, but it also sets exposure and focus. Is this too many jobs for one button to handle? A lot of people think so. Of course, different techniques work for different people, so these are just a couple of ideas you can try out and see if makes things easier for you.
The first technique is using exposure lock. Most DSLRs and mirrorless cameras have a button on the back, usually a *, and when pressed it will set and save the exposure so no matter where you point your camera after that, the next frame will be taken at the exposure saved. This effectively removes the exposure setting from the shutter button allowing it to simply focus and trip the shutter. I used to use this method for landscape photography when I wanted to expose for the sky, but focus on something else.
Another method, and the one I use now, is called back button autofocus. I switched to back button autofocus to get more consistent and accurate focus results for wildlife photography. It’s a little tricky to set up, you have look it up in your camera manual and figure out how to remove the focus setting from being attached to your shutter button and change it to being associated with another button on the back of your camera (you can use the AF-ON button or another button). When you have done that you use your thumb on the back of your camera to focus. You set your focus mode to AI Servo (continuous focus) and you end up getting the best of both worlds because you can press the button once and release it for one shot focus, or hold the button down to get continuous autofocus. It’s awesome to be able to switch between those two focus modes so easily! You don’t even have to remove your eye from the viewfinder to do it. Plus, the shutter button is now only used for exposure and tripping the shutter.
It takes some time to get used to, but now that I’ve been using back button focus for awhile I wouldn’t go back. I am getting much better results this way. I simply use my thumb to focus first and then I press the shutter button.
With these tips you’ll be well prepared to tackle the challenge and reap the rewards that come along with photographing one of nature’s great subjects: birds.
For more tutorials in this series, check out “Great Subjects”.