

We are happy to share our conversation with talented ViewBug community member DrawsWithLight. David is a UK based photographer and has received over 800 Peer Awards on ViewBug, clearly we all love his images. Below he shares some awesome tips plus insights on how he accomplishes the magic behind his images.
3 quick tips on how to improve Architecture photography:
1. Don't forget that polarising filters aren't just for making the sky a deeper blue! Polarisers remove reflections and are useful for taking these distractions out of glass, metals and polished stone etc. Using a polarising filter also gives richer and deeper colours to the building materials.
2. When shooting interiors, untidy fabrics and objects will be highlighted in the photographs. Spend time to straighten cushions, curtains, roller blind cord pulls, picture frames and bed sheets etc. before you get your camera out of its bag!
3. Research where the sun will be in relation to the building at various times during the day. Quite often one façade will face the sun in the morning and another in the afternoon or late evening. Use this information to plan your photography session and work out where the key shots need to be taken from, good planning usually rewards with quality images. There are apps available and websites too which show where and when the sun will rise and where it will set, coordinate this information with the weather forecast to avoid wasted trips.
How did you capture the perspective in this photo?
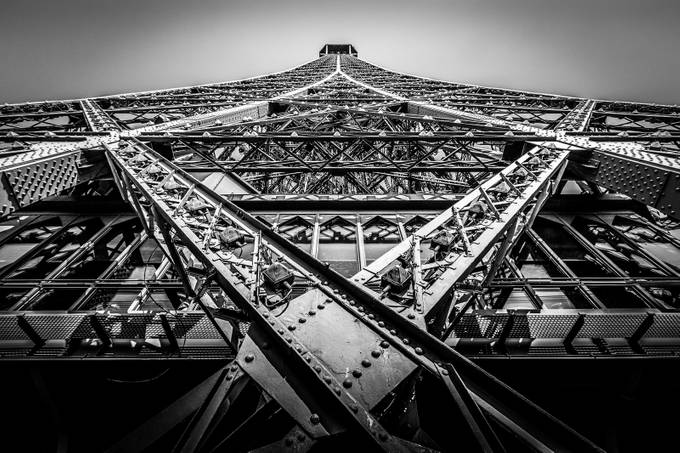
My vision was to take a photograph of the Eiffel Tower which was unique, it is one of the most photographed buildings in the world so I knew it would be a challenge! I had made it via the stairway to the lower deck of level 2, here the busy crowds meant it was extremely tricky to take a shot without somebody in it. As I walked around towards the South Eastern side I looked up and noticed a vantage point on the upper deck of level 2, it looked possible to photograph the tower un-obscured, it was also a perspective I had never seen. Once I had made it to the upper level I carefully position myself so the camera was bang on central to the tower. I used the grid on the LCD screen to level and line up the shot with the steel frame.
I used a focal length of 10mm which gave me the advantage of being able to use an aperture as big as possible to eliminate camera shake (there wasn't room to use a tripod on the crowded tower), whilst retaining sharpness throughout the depth of the shot. Using 10mm also exaggerated the perspective, making the top of the tower seem even further away, a long focal length would have compressed the view, drawing the top most level closer into the view, making the tower appear shorter.
Experience taught me that focussing about 1.5m into the view and setting the aperture at f/11 would give me more than enough depth of field for this shot. However, f/11 was giving a shutter speed too low for me to be comfortable with shooting hand held and I didn't want to increase the ISO. I fired off a few test shots, reviewed them on camera and settled on an aperture of f/9 and shutter a of 1/200.
What is your favorite aspect about this photo?

This was the first and only time I have visited Paris. Other cities in Europe and the US I had visited were littered with high rise, multi storey buildings. I had no preconceived ideas what Paris would be like, but I was surprised that the city centre mostly consisted of comparatively low rise buildings. The only structure which thrust above the sky line was the Eiffel Tower. I wanted to highlight this relationship in the photograph, I purposefully put the horizon low in the frame to accentuate the tower and the surrounding emptiness in the skyline. The shot was taken from the Tracadero to the North West of the tower.
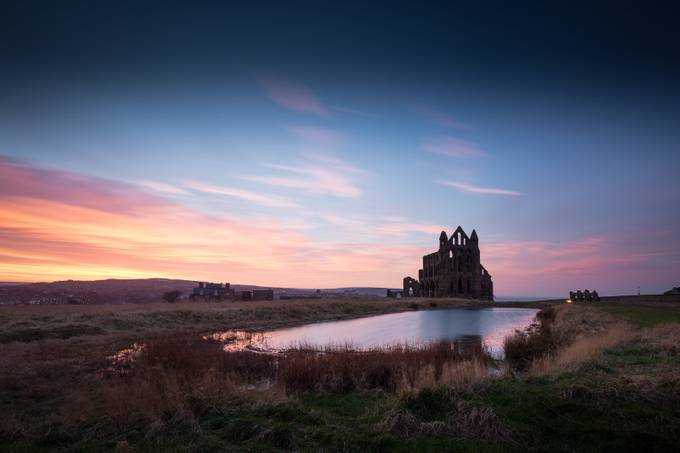
Can you share a quick tip on how to capture a similar shot to this one, how did you manage the long exposure?
I used a Lee Big Stopper and a polarising filter for this shot, giving me a 12 stop reduction in shutter time. It goes without saying that a sturdy tripod is necessary for long exposures, this one was 80 seconds. I like shooting landscapes from a low viewpoint, this means that I don't not have to extend the tripod legs and it provides an extremely solid platform for the camera. Having all the leg sections extended can make it less rigid and therefore camera shake could be introduced, especially when it is windy. If you have a neck strap attached to your camera, secure it to one of the tripod legs with an elastic band to stop it flapping around in the wind and potentially disturbing the camera.

Awesome insights and tips, make sure to use them next time you are shooting at buildings and monuments. Follow DrawsWithLight to see more awesome photos!