
We are excited to bring to you an inspiring and exciting conversation with bunlee, an outstanding landscape photographer and ViewBug member. Bun is based in Vancouver and specializes in time-lapse and "nightscapes" photography!
Hi Bunlee, can you share 3 quick tips on how to improve outdoor night photography?
1. Avoid the shakes - this refers to one of the basic uses of your tripod, the 2 or 10 seconds timer countdown release button. Use wire or wireless external remote control devices, or turn on the mirror lockup feature in the menu.
2. Know more about your gear - from camera, lens, tripod, to other accessories, like remote and cables. Keep in mind you will be operating this equipment in low light conditions, or sometimes even in complete darkness. Flashlights or headlamps sure can help. But the better you know about your gear, the quicker you can snap the shot that you want. Your camera's interface should be something that's always in your head, without having to think about where everything is. Know the maximum value of ISO you should be using in order to avoid too much noise. Know your lens well, where the sharpest settings and focus point to infinity are, as you often need to guess and try focusing in the dark.
3. Be patient and keep trying - Night photography often take 10-30 seconds or even much longer to expose a single photo. And sometimes you need multiple shots with different exposures. Focusing issues will take some time to solve. Finding and framing your shot correctly could take you a few more clicks. And by adding all these clicks together, it is easy to spend 10 minutes or more trying to get a single photo right. Not to mention the waiting time for the good lighting to come! Sometimes waiting for the moon to rise or set could be the highlight of the night.
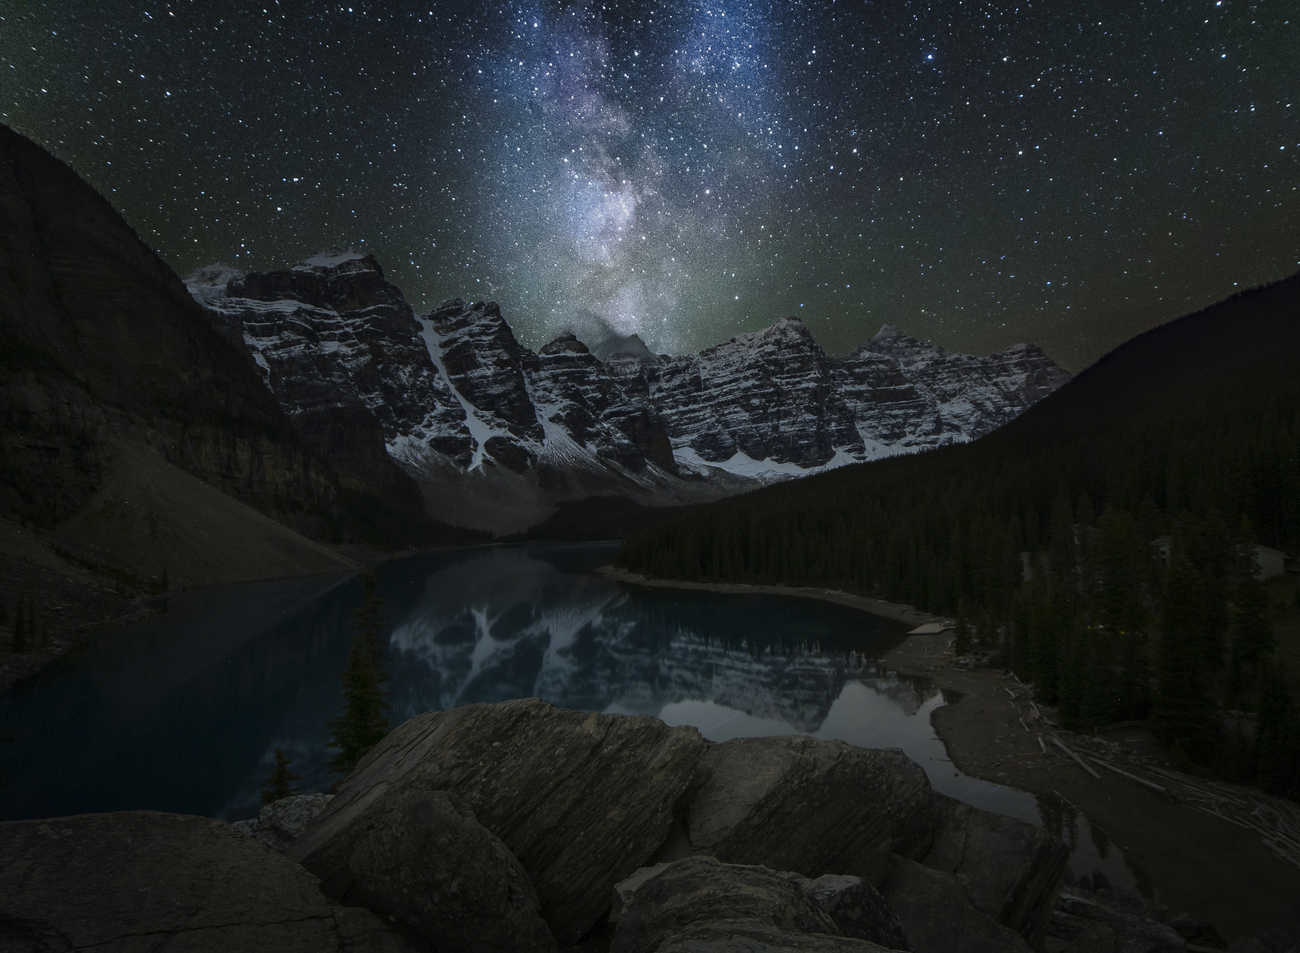
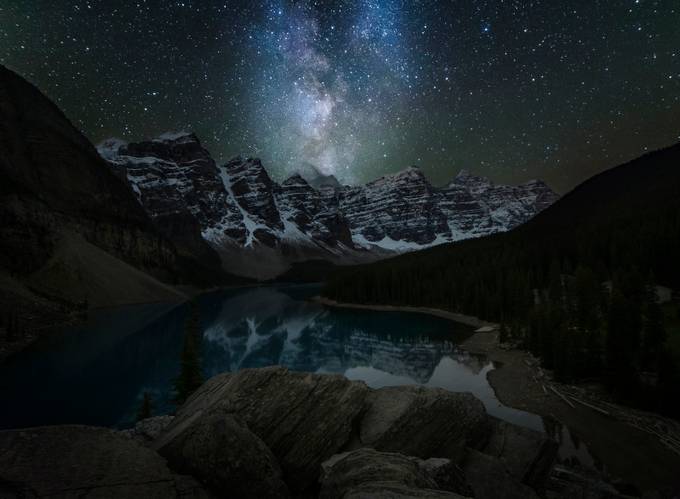
These are some awesome tips, thank you! Now to your photography, how did you capture the reflection in this photo?

The overcast skies of this evening made it look like a big storm was about to come soon. But there wasn't any wind blowing on to the lake, which made a still lake surface. And with the clear water, I could see the bottom of the lake and the reflection from the skies clearly. I quickly grabbed my camera, set up my tripod and did a test shot. And the result let me know that the scene could not be captured with a single exposure. So I carefully used different exposures to capture the skies, the mountains, and the bottom of the lake with reflections of the skies. Then I blended them all together in post.
What is your favorite thing about this photo?

A good subject, composition, and lights are all fundamental elements of getting a good photo. The majestic view of the subject, Petyo Lake, against Caldron Peak, naturally forms a perfect composition. The sunset lights coming from behind the mountain lighten up the top of the mountain range on the right. All 3 elements are there. But I think my favorite thing would be the clouds, which are also working with the composition and creating some leading lines.
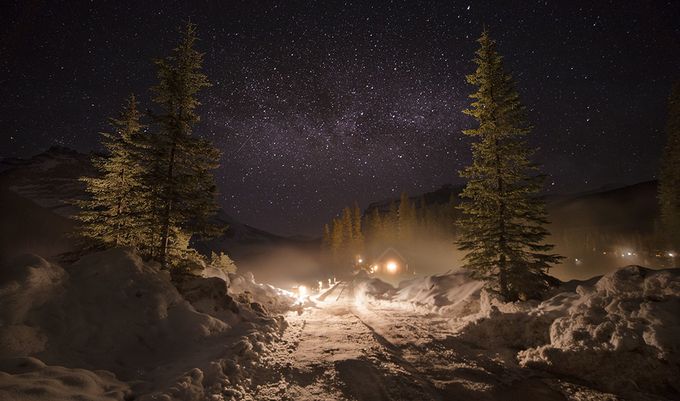
Can you share a quick tip on how to capture a similar shot to this one?

I think I'd say being in the right place at the right time is the key. First, finding a location with an elevation that allows a view of a distanced road is the first step. Capturing a long exposure light trail will require either taking the shot at dusk with colorful skies, in the evening with blue hour, or at night with starry night skies. Next to be considered is how busy the road will be during different times of the evening. The reason why I named this photo 'Long Wait' is because there is a funny story behind this photo. My friend and I were driving from Vancouver down to Mt. Baker for some night photography and we found this location and wanted to shoot a light trail photo. As we arrived before sunset, we had enough time to set up our composition and wait for the night to come while we were having our sandwiches for dinner. Since the road is a dead-end to the top of the ski resort, there isn't any traffic anymore after sunset. After another 40 minutes went by, I suggested doing the driving on our own. So I had my friend press the release remote for me as I drove down to the valley myself. Luckily we only had to do this twice before we got the photo we are happy with. The exposure time was just a little over 2 minutes. And I took another shot with a shorter 30 seconds exposure to expose the starry night sky without any star trails and combined them in post.
Can you share the Story Behind This Photo?

The story behind this goes way back, as Grand Canyon was the place where I started my interest in landscape photography. Since the first time, I visited this place. I always wanted a solo road trip back to the Grand Canyon. The sunset I experienced wasn't the greatest. The skies were clear, but the air was hazy with limited visuals in the distance. Some might even say it was a bad condition. Although the visibility was not very good in the distance, the hazy air created these layers of mountains in different depths. It then became the subject of my shot. So I changed to a telephoto lens and captured this photo.
What are you trying to capture/say?
I was trying to capture the layered mountains under this hazy condition - the shades of different depth.
How do you know if it’s visually interesting?
When I saw the layered mountains, I already knew there was something visually interesting. But it was more about how to frame it and capture the scene that you saw with your naked eyes.
Are you thinking about perspective?
It is all about your perspective on what kind of composition best capture it. My choice of lens was using a telephoto lens to pull in and frame the layered mountains.
Are you using a tripod?
Yes, as I am also a time-lapse photographer, the tripod is a must-have item. And often I have more than one with me!
What time of the day was it shot and what aperture did you use?
It was taken around 7:30pm right before sunset, f/8 aperture.
Was the photo planned?
It was planned to be at the location, but this particular photo was not planned at all
How are you choosing to stay close or far from the subject?
Usually, when I get to a new location, I will take some wide-angle shots first as a scenic view, which often requires a wide lens to capture. It's great to start some test shots, looking around the environment and then starting to slowly take them in. I try to observe how lights is hitting different parts of the landscape environment I'm in. In this case, I started with a wide shot and then zoom in to an area I found interesting. But if you are talking about a foreground subject, always try to get closer!!
What is your mindset when it comes to POV?
The use of a lens is a great way to simulate different POV with different angles of view, aperture settings, etc. Your camera is a gear that represents an extension of yourself that allows you to capture what you see. Literally, the lens in the eye of the camera. I think it is fair enough to relate that to POV.
Are you thinking of the rule of thirds/how?
Definitely yes! Rule of thirds is almost like something imprinted in my head when I'm looking at a view through the lens. Use it when cropping my 2:3 photos on Instagram. And the best way to start keeping the rule of thirds in mind is to turn on the grid mode on your camera using the live view.
Are you thinking of symmetry?
I constantly look for symmetry when searching for my frame. It is something I always keep in mind, but it's not easy to find. Moving around as well as changing perspective and angle certainly helps to find them.
Are you thinking of reflections?
It's always great to have reflections in the frame. No matter if it's from a lake, ocean, windows, mirror, or even a pool of dirty water on the street.
Are you paying attention on the subject only or also background and why?
Both! Knowing what's being captured through the lens is important no matter if it's the main subject or background.
Are you thinking of the angle? why did you choose this angle?
The angle of the view provided the maximum layers of mountains. That's what gave the maximum numbers of shades in this monotone image.
How did you choose color vs B&W?
I had a long debate myself between using color vs. B&W. I finally decided to keep the sunset glow there with color. It would be hard to judge what time of day the photo was taken if I decided to go with B&W instead.
Did you do any post-processing? if so, what?
I use different post-processing techniques depending on what is required to capture the moment. I like digital blending and I use it in a lot of my photos. But on this Grand Canyon shot, there are only some minor adjustments in Camera Raw. No processing was done in PS or other applications.


See bunlee's profile and get inspired!