
For a long time, it was very difficult for the average photographer to capture good images of the night sky. Film simply wasn’t light sensitive enough to capture high quality images with short exposures. The digital revolution has changed all of this. If you take the time to learn some of the basics of night photography that I’ve outlined below, you can quickly start capturing stunning images of the night sky with relatively inexpensive equipment.

EQUIPMENT
When shooting at night, it helps to have a newer digital camera that is rated well for low-light ISO performance. It’s also preferable to use a lens with a very wide aperture that can let in a lot of light. You’ll also need a sturdy tripod when shooting at night. I provide detailed information on equipment I recommend for night photography at https://www.gcollier.com/gear/.
PLANNING YOUR SHOTS
If you take the time to plan when it will be best to photograph at a particular location at night, you will almost always get results that are superior to an unplanned shoot. One of my favorite software programs for planning night shots is called Stellarium. It shows exactly how the night sky will appear from any location around the world at any date and time you choose. This program can be downloaded for free at https://www.stellarium.org/. It can also be purchased as an iTunes or Android app.
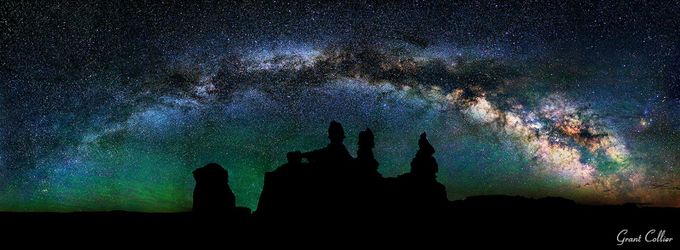
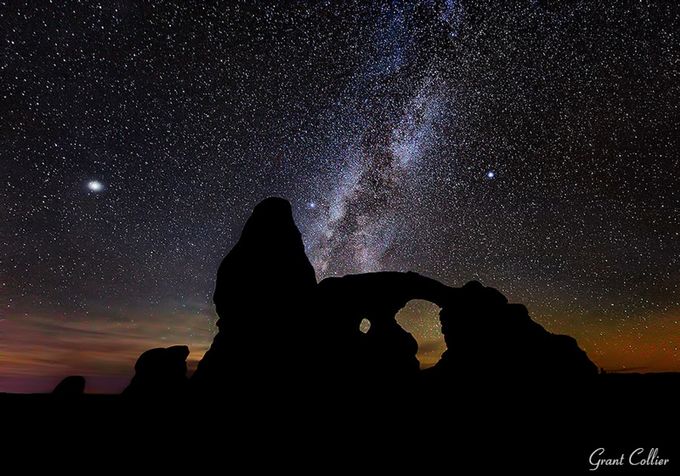
Stellarium is especially useful for previsualizing the Milky Way. The Milky Way is one of the most dramatic objects to photograph in the sky, and its location changes constantly throughout the night and throughout the year. By checking Stellarium to see where the Milky Way will be in the sky, you can plan for it to be over a specific object, like a rock formation or a mountain.
CAMERA SETTINGS
Using the correct camera settings is very important when shooting at night. With the proper exposure, you can capture remarkable images with minimal noise and maximum detail. However, a simple mistake can cause a photograph to be very noisy or completely out of focus.
Shutter Speed
Determining the proper shutter speed for shots that include the night sky can be tricky. A one-minute exposure will yield better-quality images than a six-second exposure because you are letting more light into the camera and therefore increasing the signal-to-noise ratio. However, during the course of a one-minute exposure the stars will move across the sky and create small star trails in your image. This is not ideal if you are trying to capture stars that appear as round points of light, like you see them with the naked eye.
You need to find a way to get exposures that are as long as possible without producing noticeable star trails. This is where the rule of 500 comes in. With this rule, you take 500 divided by the focal length of your lens to determine the shutter speed. For example, if you are shooting with a 50mm lens, you take 500/50=10. So 10 seconds would be your shutter speed. If you are shooting with a 17mm lens, you take 500/17=29.4. So 30 seconds would be your shutter speed.
If you are not using a full-frame camera, then you will need to first multiply the focal length of your lens by the crop factor before using the rule of 500. For example, if you are using a 16mm lens on a camera with a 1.5 crop factor, you will multiply 16mm x 1.5 to get 24mm as your effective focal length. Then take 500/24=20.8. So 20 seconds would be your shutter speed.
Aperture
When taking photos at night, you will generally want to shoot with the widest possible aperture on your lens. The widest aperture is the lowest number aperture, like f2.8 or f1.8. This is very important at night because you need to let in as much light as possible to help minimize noise.
One exception to using the widest possible aperture is if you have an extremely fast lens, like f1.4 or f1.2. Even with the best lenses, the corners of the image can show a lot of softness at these ultra-wide apertures. The widest aperture I generally shoot with at night is therefore f1.8 or f1.6.
ISO
Once you’ve determined your shutter speed and aperture, it’s time to set the ISO. In the majority of cases, you will want to use the highest native ISO on your camera in order to get the best quality images with the least amount of noise. Native ISOs are represented by a number, such as 3200 or 6400. You should avoid using extended ISOs. These ISOs are generally represented by letters such as H1 or H2.

One exception to using the highest ISO is if it causes the highlights to be blown out in the image. You can check for this by looking at your histogram. If there is a spike at the very right edge of your histogram, then the highlights are blown out. Or, if you have the highlight alert enabled on your camera, the blown out highlights will blink on the image on the LCD screen. An image with overexposed highlights will be of noticeably lower quality than an image that is slightly underexposed from the use of lower ISOs at night. So you’re better off using lower ISOs if there’s any chance of blowing out the highlights.
Focusing
The easiest way to get a night shot in focus is to set your camera up during the day and get your focus right before it ever gets dark. However, if you can’t do this or you need to change your focus during the course of the night, there are many ways to do this.
If you don’t have a close foreground object in your shot, you can simply focus at infinity. If there is a moon out, you can do this by using autofocus and simply focusing on the moon. If there is no moon out, you can zoom in on a bright star using Live View on your LCD screen. Then, manually adjust the focus until the star appears as a small, sharp point of light.
If you have a close foreground object in your shot, you’ll need to focus at twice the distance of the nearest object. One way to do this is to place a flashlight at that distance at autofocus on the flashlight.

After you take a shot, make sure and zoom in all the way on the image on your LCD screen to ensure that everything in your shot is in focus. Sometimes, if the foreground object is too close, it will be impossible to get everything in focus in a single shot using a wide aperture. In this case, you’ll need to use a technique called focus stacking, where you blending multiple shots taken with different focus points.
CONCLUSION
This is really all you need to know to start capturing impressive images at night. However, there are many advanced techniques that can greatly expand the possibilities available to you. If you’re interested in learning these techniques in detail, I now have a book called “Collier’s Guide to Night Photography”.
Grant Collier has been working as a professional photographer for 20 years and has been shooting photos at night for 12 years. He is the author of 11 books and produces 3 yearly wall calendars. In addition to his new night photography guide, he has also produced an instructional video called “Collier’s Guide to Post-Processing Night Photos.”