
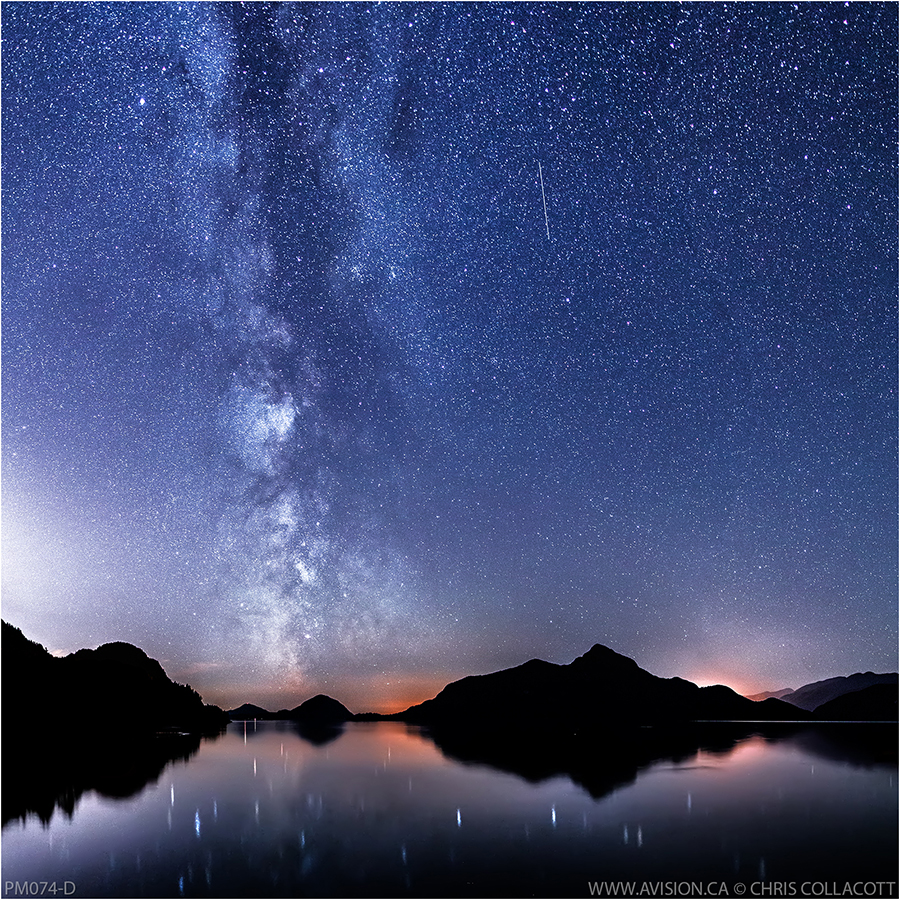
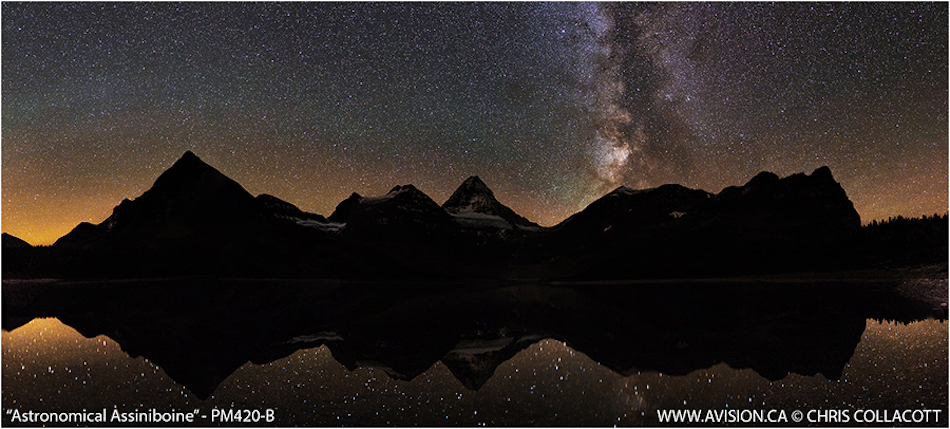
We are excited to share the following tips by guest judge Chris Collacott. Chris is an international award-winning photographer who is known for his stunning natural landscape, architecture, and cityscape images. He specializes in large-scale panoramic photos. Collacott’s recently achieved highest scoring gigapixel image and 4th place overall in the EPSON Pano Awards 2013 for the built environment, and one of his most notable accomplishments include having one of his Vancouver Skyline photos showcased on a 23-foot mural in the 2010 Vancouver Winter Olympics Athletes Village.
1. The Gear
Before you even get in your car to go and get shots of the Milky Way – you should check to make sure your camera gear is up to par to do the job properly and well. Unlike a lot of photography – Milky Way shots cannot currently be achieved using a mobile phone or even entry level DSLR gear. Since the Milky Way is so dark – this is a clear case where “the gear makes a difference” in the shot, not just the shooter.
The first thing you need (and this should be obvious) is a steady tripod. Since you will be doing long exposures, you need to ensure that your camera will not move or even vibrate at all while the shot is taken. You need your tripod to be steady enough to handle a bit of wind as well in the event it is windy.
2. The ISO
The second thing you need is a camera body with a decent high ISO ability. Your camera should be able to capture at ISO 3200 without too much noise. So if your camera is several years old and/or entry level – this might make the image way too noisy. Thirdly, and one of the most important for a clear shot of the Milky Way is a lens with an aperture of 2.8 or wider. If it is narrower than that, you will need a longer exposure, which may result in star-trails – or a capture that is too dark. I would also recommend a wide focal length. On a frame camera 24mm or wider. In general, to achieve clear Milky Way shots you have to avoid star-trails. To avoid star trails, Based on a full frame camera there is something called the “Rule of 600”. Basically the calculation is that your exposure time should no longer than: 600/<focal length> (in seconds) before star-trails show up. So for example, if you are shooting at 24mm you then calculate 600/24 = 25 seconds. So this should help determine the maximum number of seconds your exposure can be with your focal length, before you get star-trails.
Once you have the right gear, the next and equally important factor is your location. You will never get a Milky Way shot in the middle of a dense urban city. You need to get out to a very dark place, a good distance from city lights. If you live in North America, here is a link you can measure your location and light pollution.

3. The Moon and Sun
After finding the right dark location – be sure to check the phase of the moon. No point in heading out if the moon is in the sky as it will make a huge impact on how the Milky Way will turn out.
Be sure to also check when the moon rises and sets as sometimes even if the moon is half full – it may set early in the evening giving you a moon free sky! These are things you can check well in advance. You can also check when astronomical twilight starts. This is the point in time where there is zero influence from the sun even after the sun has set.
4. The “general” Settings
Now that you have the right gear, found a very dark location, and know the sky is moon free, it is time to shoot! In “general”, if you set your camera to F2.8, a 30 second exposure, and ISO 3200, you should see some great results. In addition to these settings I would recommend using the mirror-lock and a remote trigger to avoid shaking from pressing the button. Or if you don’t have a remote trigger, just set your camera to delay by 2 or 10 seconds.

5. The Mobile Apps that can help
There are so many apps for your mobile that can help you plan for your shoot. In North America, there is an app for Clear Sky Chart. This “weather forecast” for astronomers – and can give you by the hour forecasts of cloud cover, how much smog is in the air (transparency) and even atmospheric turbulence. There should also be lots of apps for finding the times of astronomical twilight, the moon/rise. I use Sundroid for my Android phone. You can also get an app to determine where the milky way will be – in terms of position, which can help in your composition. The best thing for night sky shooting is being prepared and avoiding going out on a night that will not be good. This can all be done from the comfort of your phone well in advance.